Sunday, 8 February 2015

M.A.C Ruby Woo Review // First Impressions!!!

leluroxx.blogspot.co.uk


YOOOOOOOOOOO!!! 

Again it has been a while since I last posted something. I really need to schedule some time in to write again regularly. I am so lazy sometimes. But today I am back with a little ol' review :) 

I received my first ever Mac product on Christmas Day. I did put this on my 'most wanted list' and gratefully my parents got it me. 

This was the Mac Retro Matte Lipstick in 'Ruby Woo'. It was all beautifully wrapped and placed actually on my Christmas tree with a bow on it and I instantly knew what it was as it was so cute and small. 


leluroxx.blogspot.co.uk


Now, I am a little bit of a hoarder when it comes to new things. I have mentioned this fact before and it's nothing new to me, so it will be no surprise that I have ONLY JUST opened this lipstick.

I love things when they are in their 'new' state and because I have never had a Mac product before I really didn't want to ruin the state of this beautiful product. 

Okay, so my first impressions when opening this product was "wow". I loved the bullet style packaging, I also loved the simplicity of the brand itself. It stands out and looks classy without even trying.

leluroxx.blogspot.co.uk
  

The first thing that I noticed about this lipstick upon opening it was the smell!!! OH-MY-GOD, it smells AMAZING!!! No joke, to me it literally smells like cakes. It has this subtle sweet/cakey scent that really makes me want to eat it. I never really say that about a product, especially a lip item as usually they smell and taste like plastic. Like you know it's come from a factory. 

This lippy smells like heaven, if heaven was to smell like anything it would be this. Period. 

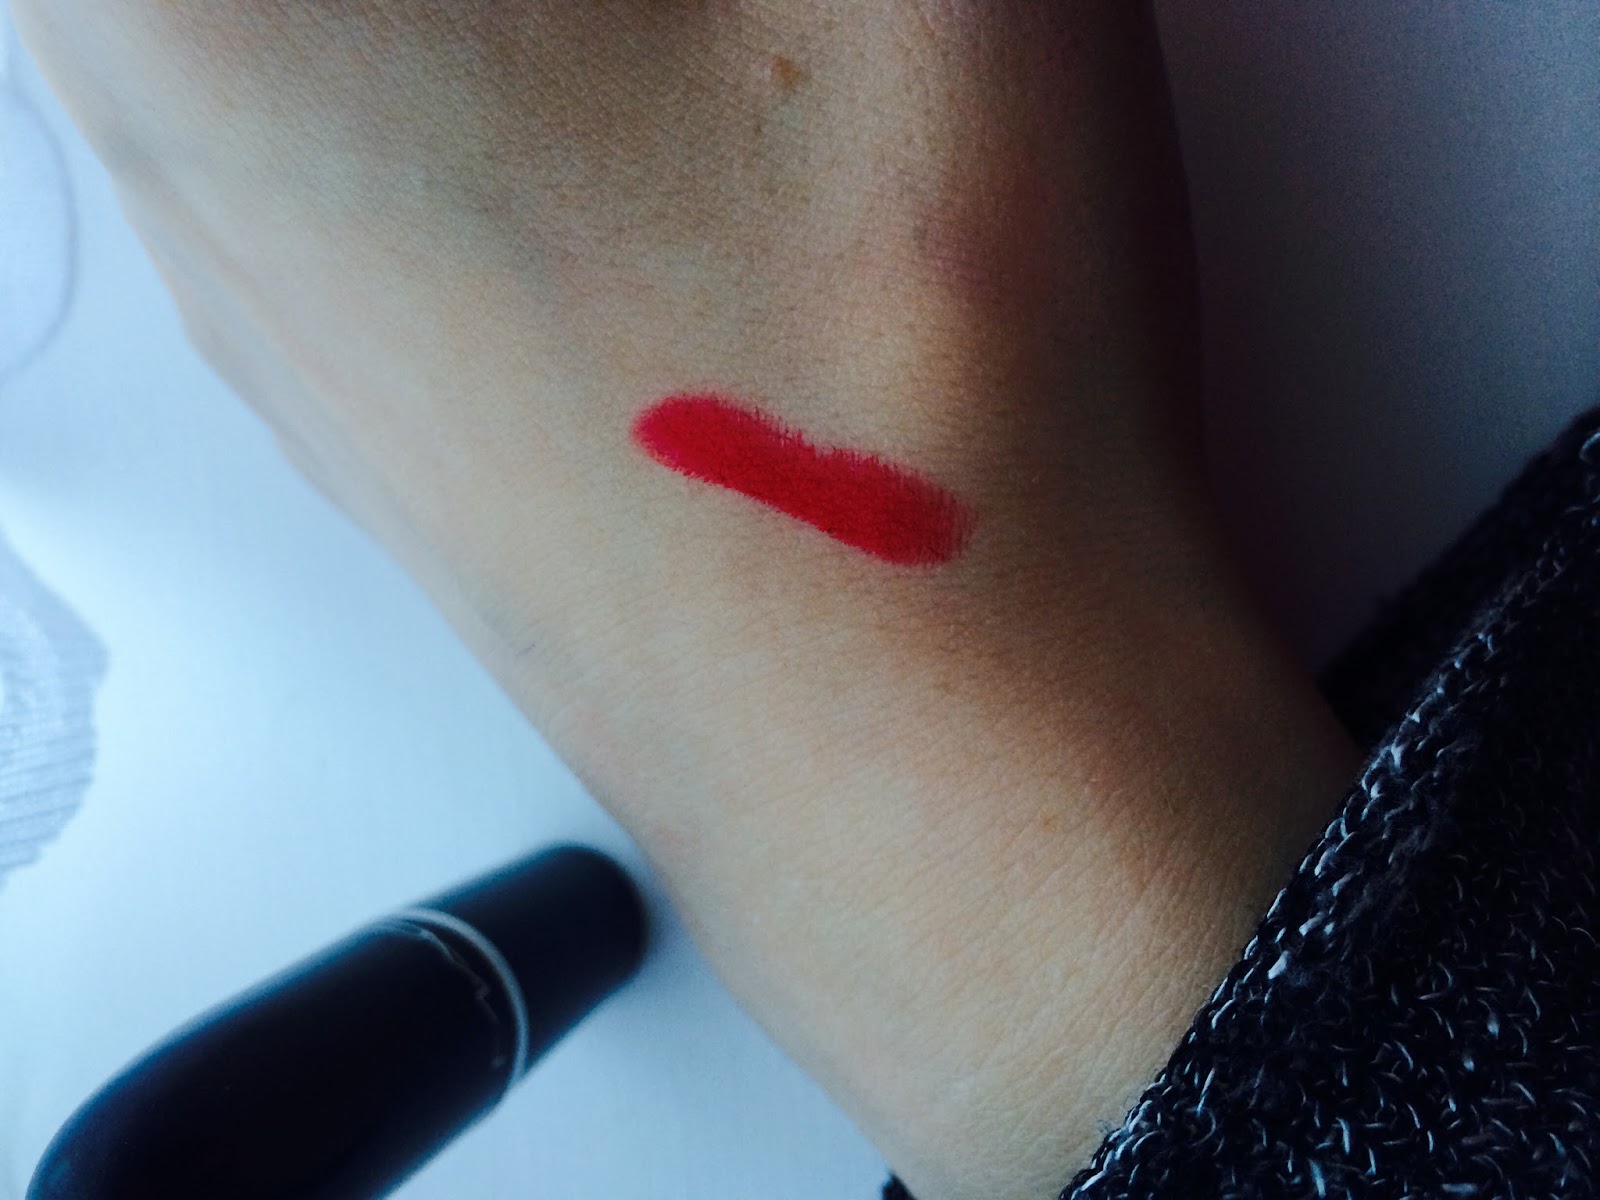
Aside from the mouth-watering smell the colour of this lipstick is flat out gorgeous. It is so pigmented and vibrant and such a classic 60's style 'red'. I  LOVE a red lipstick especially as I am a pale face (no not a vampire) it really stands out on me. It is super retro in style and how the colour looks in its formed self reflects perfectly on your lips. 

leluroxx.blogspot.co.uk


Now I will only wear a matte consistency lipstick as I dislike any kind of sheen or gloss, the reason being as I like to slightly over draw my top lip so it is consistent with my bottom lip. I have been reaching more to lipliner's recently to fill in my lips (especially the Rimmel Red Diva and Cappuccino) but with 'Ruby Woo' being a Matte in my head I knew I would love it. 

leluroxx.blogspot.co.uk

leluroxx.blogspot.co.uk


So I have come to the conclusion that is smells awesome and looks beautiful but what is is going to be like to wear? 

As soon as I popped this bad boy on I noticed straight away how matte this lipstick actually is. I didn't realise until today that this is the mattest (is that even a word?) of matte's that Mac do, they have a normal matte finish and then 'retro matte'. I though it just said 'retro' because of the type of colour, but nope this is a hell of a dry lipstick. I first used this with my Rimmel 'Red Diva' lipliner but only outlined my lips with it and then filled them in with Ruby Woo. Within seconds of applying I noticed straight away how uncomfortable my mouth felt. The only way I could describe it is that it felt like I had eaten a doughnut and wasn't able to lick my lips, either that or it felt like I had face planted a pile of sand. It does feel gross to wear, I am not going to beat around the bush, it's not enjoyable at all. 

leluroxx.blogspot.co.uk


I also found that it wore off quicker than I thought so when you go to re-apply a layer to build the colour back up it really intensified in dryness and created a horrible 'ring of death' around my mouth. I hate that. It also crumbled around the lipliner and left little white streaks and dots where the product has come off, that has never happened to me before. 

leluroxx.blogspot.co.uk


This really annoyed me as I have longed for Mac products for years but always thought they were expensive, so I kind of had high hopes for this but I was seriously let down by the formula. However now I know 'retro' is really dry I am hoping the normal matte shades would be way better. It has up until now put me off purchasing any more lip products from them but with this new information I think I may give it a whirl. I really want to try out the 'Burgundy'lip liner and 'Diva' lipstick and I also really want 'Velvet Teddy' but it's always sold out. 


The plus side to this product is (that is if you can handle the intense dry mouth) is that the lipstick looks frickin awesome on, like I said it's highly pigmented and if you are feeling really crap one day, put this on and you will feel like a god damn 60's pin up. 


leluroxx.blogspot.co.uk


Okay, maybe I wouldn't go that far but it does make you feel fabulous!! For it to really stand out though I would suggest keeping your eye makeup very miminal, either a bit of mascara and leave it like that or with a small cat flick on your upper lid. 

Let your mouth do the talking. :) 


leluroxx.blogspot.co.uk
Taken when I bought my Tanya Burr book
(excuse the wide eye look) 


I hope that this little review has helped you make a decision on whether to buy this lipstick or not and if any of you readers have any tips or even comments about what you have thought of Ruby Woo let me know. 

SHARE:

Monday, 8 September 2014

Colour B4 Hair Stripper // Is It Worth It? My Review.

leluroxx.blogspot.co.uk


I love to change my appearance, especially where my hair is concerned. I have coloured my hair for years now, never myself though as I have mainly worked in hairdressers, so I have always had it done there.

Almost two years ago I was bleached, white blonde and I have always wanted to go this colour. After having a lot of my hair cut off to go that colour I soon managed to have the shade I desired and began to grow my hair again. 

leluroxx.blogspot.co.uk
 This is what it looked like not long before I dyed it brown.

I have always had like little nightmares about going dark but one morning I just decided to do it. Now that I have been dark for almost 2 years I have decided I want a bit of a change. I want to go lighter but not as white as I went before.

Obviously I have bleach under the colour I have now as that will always stay there until it eventually grows out or I have it cut out. Having it cut out is NOT an option for me.

No way!!!


leluroxx.blogspot.co.uk


To get my hair remotely lighter I would need to strip the colour I have on it currently, which you can see in the above picture. I have had bleach baths done before at the hairdressers and it does damage your hair and I didn't want to stress my hair out again and risk it snapping off. 

I was told about the at home stripper called 'Colour B4' which was originally created by Scott Cornwall, but he has since done another similar product and this one has been taken over by Katie Price, as the Ambassador. 

The product claims to strip your hair without the use of bleach or ammonia which would damage your hair but instead shrink the hair colourant particles and they get washed out by using Colour B4, leaving your hair in its natural state. 

I hesitated buying this product because I was unsure about it but because it claims to not damage your hair but take it back to the colour underneath, I thought "what do I have to lose?"

Big mistake. 

I will now tell you why.

leluroxx.blogspot.co.uk

I bought the Colour B4 in'extra strength' because that was what was needed for my hair colour and got the argon oil version as I thought it would put some nourishment back into my hair.

These are £11.99 a pop and I ended up using 3 boxes, two boxes on my first application to make sure I saturated my hair fully as it is long, and one on my second application just to get the remaining dark patches. 

I had watched YouTube video's on how this applied but I went through all the instructions that came with it with a fine tooth comb to make sure I did everything right.

Before I even touched my hair with this product I did a strand test to see what colour my hair would go. 

This was the result. 

leluroxx.blogspot.co.uk
After the processing time.

leluroxx.blogspot.co.uk
Once dried. 


This is the contents of the box.

leluroxx.blogspot.co.uk

It came with gloves, instructions and bottles A, B and C. You then pour (A) the activator into bottle (B)the remover and shake for 30 seconds, I timed EVERYTHING to make sure it was all done properly. Part (C) is the buffer which you use in the rinsing stage at the end. Once (A) & (B) are mixed together you are good to go. 


 leluroxx.blogspot.co.uk

I sectioned my hair because I had a lot of it and need to make sure every strand of hair had the remover on it. 

And let me tell you now, this stuff stinks. At first it smells like perm lotion which I was fine with but after a while it smelt of eggs and when it was drying to me it smelt like a 3 day old kebab. It actually made me feel sick. 

Anyway, I coated all my hair in the remover and used two boxes. It was safe to say my hair was fully saturated in the stuff. I also combed it through too to make sure it was evenly distributed. I then proceeded to wrap my head in cling film so it would trap my head heat. You need to keep the product on your hair warm so it processes. I put a towel and two hats on too to make double sure it would all go smoothly. I kept mine on for 60 minutes. 

Once the time was up I was a bit apprehensive to take the cling film off because I had no idea on what was underneath and if I still had hair on my head. I say this because a lot of my hair was coming out when I was combing the product through in the beginning. 

I looked in the mirror and my hair was a bright copper colour all over. I was shocked it actually worked. It took the whole lot of my colour off, or so I thought!

The next step was the gruelling task of the wash off. I then had to rinse my hair for 10 minutes non stop to ensure the product had come off my hair. I then had to use the buffer (bottle C) and lather up and leave on for 1 minute, again all this was timed. I then had to rinse again for another 10 minutes and once that was done I then had to use bottle (C) again and do a normal shampoo. It didn't say to use conditioner after so I didn't. As I was washing it off I did notice my hair was progressively getting darker...Not like the copper colour it first came out like.

This is what it looked like once dried.

leluroxx.blogspot.co.uk
The strand test against my colour before it was stripped.

leluroxx.blogspot.co.uk

leluroxx.blogspot.co.uk


As you can see after the first application it had lightened my root area and only slightly on my mid-length and ends. It looked like I had a reverse dip-dye colour and definitely not the outcome it looked like I was going to have when I took the cling film off.

Far from the all over copper colour it was perceived I was going to have. 

I thought about it and decided that I must have had quite a bit of colour build up on the mid-length and ends so decided to get another box and re-do those parts and not touch the ends. You can re- apply up to three times in one go, or so it claims.

So a couple of days later I re-did it. This time it had lightened some more but the ends were a little darker still than the rest and it was really patchy and there were some dark parts in my root area which I couldn't explain as they weren't there before. And, I hadn't applied any colour there. I left my roots out of the second application.

When I had seen everyone's "supposed" outcomes from the product their hair is all one colour and even. Mine wasn't at all and a far cry from anything similar. I wasn't impressed but thought I'd live with it until I had it highlighted. It came out quite red/auburn and I kind of liked it. 

leluroxx.blogspot.co.uk


leluroxx.blogspot.co.uk

leluroxx.blogspot.co.uk

leluroxx.blogspot.co.uk

leluroxx.blogspot.co.uk

leluroxx.blogspot.co.uk

As you can see it went a really nice colour and I actually really liked it. It looked more even at night time but obviously in the day light you could tell it was slightly two tone. I could of lived with it though.

Now this is where it started to go wrong.

I decided to wash my hair 3 days later because it felt REALLY dry and disgusting. I wanted to wash it to make it feel like I had hair on my head and not an egg. Now this product had done some sort of damage because my hair felt so dry and a lot had snapped off.

After I had finished washing and my hair I noticed it seemed to be quite darker even when wet. I ignored it and thought it would be back to how it was before I had washed it when it was dry.

Nope. 

After I had dried it this is how my colour looked.

leluroxx.blogspot.co.uk

leluroxx.blogspot.co.uk

I mean "WHAT THE ACTUAL HELL"? 

All I did was wash my hair, there was NO reason for it to go darker. I just don't understand. I followed the instructions EXACTLY, after the second application it lightened and you can see from the pictures that it had. I washed everything out and now it's significantly darker.

Why? That is what I want to know. I have not applied any colour and it can't re-oxidise from just a simple wash 3 days later. I am actually flabbergasted with the results and to be honest disgusted with the product as a whole. I have shown hairdressers' these pictures and none of them have ever seen this happen with a product before and most of them have never heard or even used Colour B4 so couldn't advise me on why this has happened. 

I have emailed the company a complaint but as of yet I have heard nothing back off them. 

I will be completely honest with you now, this product is complete crap and I wouldn't recommend it to anyone. I am aware I had a lot of colour build up and I wouldn't get all the dark colour out due to cuticle staining. But after the second application it came out a 'decent' colour even though it was patchy, I cannot for the love of God understand why on earth it would almost go back to my original dark colour just through washing my hair. I would of had to have coloured it to get it that dark again as the colour was stripped out.

I am completely baffled.

It's left my hair in horrible condition, it's thinned out a lot and now I am left with what looks like massive roots that I am going to have to have corrected professionally. 

Not cool... Not cool at all.

I am actually quite annoyed about the whole thing and the fact I have wasted quite a bit of money. That is the whole reason I did a strand test, and I cut the hair where there was most colour build up and you can see from the picture's that it had lifted really well. 

On their website it shows 'before and after' pictures and a lot of the people have obviously had their hair re-coloured and bleached which is not actually showing the true results a lot of the time. It's deceptive and by all means if you still want to try this product that it totally up to you, but I highly wouldn't recommend it at all. It's an awful product and not worth the risk. 

If anyone reading this could explain to me why my colour darkened after washing I would love to know, or if you yourself have had a similar experience I would love to hear from you. 

I hope this has helped you overall in regards of what to expect from this product and the procedure you have to endure. 

SHARE:

Monday, 18 August 2014

Fishtail Braid.// Tutorial In Pictures.

leluroxx.blogspot.co.uk


Hellooooo Ladies!! 

I finally learnt how to do a fishtail braid the other day and I was so proud of myself. I attempted to do it a few months ago and it went severely wrong. I thought it seemed really hard when I first gave it a go, but trust me once you have tried it a few times it's actually super simple. 

I understand it would be much better to watch this on a video so if you would like me to do a tutorial on my YouTube channel then let me know. Today I will placing step-by-step photo's of how to create this look. I had to do it on my web camera as I didn't have anyone to take the photo's for me so excuse the quality. 

Hopefully through following these easy steps you will be able to create this braid yourselves in no time. 

Here we go. 

Firstly, you will need to comb/brush your hair through to ensure your hair is knot free. You will thank me after :). 

I used a Tangle Teezer to get my bad boy knots out and there were a lot of them. 

leluroxx.blogspot.co.uk


Next I would give the roots a little back comb. I don't have to explain the process, y'all know how to do it. 


leluroxx.blogspot.co.uk


Then you will need to pull all your hair to one side and divide it into two sections as shown. 

leluroxx.blogspot.co.uk


Whilst holding on to both sections, take a small section from underneath of one of the sections.

leluroxx.blogspot.co.uk


Then pull the underneath piece of hair to the front of the other section.

leluroxx.blogspot.co.uk


Like so. 

leluroxx.blogspot.co.uk


Then repeat from the other side. So Again from the opposite side this time pull an underneath section.


leluroxx.blogspot.co.uk


Then pull it across to the front of the opposite side. 

leluroxx.blogspot.co.uk


This is what you should now have. Like an 'x' shape.


leluroxx.blogspot.co.uk


And then keep repeating the process until you have reached the end of your hair. 

leluroxx.blogspot.co.uk

leluroxx.blogspot.co.uk

leluroxx.blogspot.co.uk

leluroxx.blogspot.co.uk

leluroxx.blogspot.co.uk

leluroxx.blogspot.co.uk


leluroxx.blogspot.co.uk

leluroxx.blogspot.co.uk


This is how it should be looking as you're going through your hair. 

leluroxx.blogspot.co.uk


And this is how the finished product should look.

:) 

leluroxx.blogspot.co.uk


Pull the sections out a little so the braid isn't so tightly plaited. And voilĂ . 


leluroxx.blogspot.co.uk

Please let me know if you have found this hard to follow and like I said I will do a video tutorial for you. 

I hope you enjoyed my take on this super cool braid.

Until next time....

SHARE:
© LoneWolfLeya. All rights reserved.
Blogger templates by pipdig