Monday 21 March 2016

Damaged Hair | 10 Hair Care Tips To Get Healthier Locks.


leluroxx.blogspot.co.uk


"Hello... It's me... I've been wondering if after all these years, my hair would grow to my feet".

The answer to that is simply a no. 

"why is that" you ask? 

The only logical answer to that is, if you have damaged hair it's going to take a while to fix it, before you even think of it growing longer.  

Sounds like a horror story right? Have no fear though because I am here to help you lovely lot on how you can transform your damaged locks to healthy strands of goodness that will grow before your eyes. 

I talk from experience and this is why I am writing this post to help those who have over processed their hair either through, heat damage, colour damage and the dreaded back-combing. 

I have done it all, bleached the hell out of hair, full on blasted it with a lot of heat that could rival the sun and back-combed my hair to an inch of its life. All these things are super bad for your tresses and if you think about it, deep down you KNOW it's bad news but we all still do it. 

I have worked at hairdressers for many years and I have learnt A LOT about hair, I have learnt my lessons and I have advised others. 

Blonde hair especially needs extra care when it comes to keeping it in healthy condition due to the bleach/peroxide being used and brunettes... Well you can see damage easily - particularly split ends.  

I had my hair stripped a year ago, it was almost black in colour and to lift it I needed a bleach bath (hardcore) full head of highlights & tint... And then the worst was yet to come. 8 Inches off my hair. 

I was almost sick in my mouth, my hair disintegrated in the foils and I had to have a lot cut off. 

leluroxx.blogspot.co.uk
BEFORE

leluroxx.blogspot.co.uk
AFTER

Since that day I have taken my own advice to look after my hair properly, to let it grow healthier and longer. 

I do not want to experience that again. 

So, if you are like me and want longer hair, follow my tips and you will be on your way to permanently removing those extensions. 


Tip 1: Use The Correct Shampoo & Conditioner.
 

leluroxx.blogspot.co.uk


It is really important to use the correct shampoo and conditioner (separate bottles not a 2 in 1) for your hair type. Obviously you are reading this so your hair is currently damaged in some form or another. You need to cater to this. I am currently using the Garnier Ultimate Blends 'Honey Treasures' Shampoo & their 'Nourishing Repairer' Conditioner. These are specifically for those who have dry, damaged or brittle hair. 

Do not wash daily as it strips your hair and scalp of essential natural oils. It causes more harm than good. 

The importance of getting this basic step correct is ten fold because these types of shampoo and conditioner's will be adding and replacing essential nutrients, proteins & repairing the hair shaft. This in turn helps prevent those ghastly split ends which causes the hair to snap and lose length.


Tip 2: Coconut Oil. 

leluroxx.blogspot.co.uk


This is one of the most inexpensive items you can buy that is super good for your hair. You can also use coconut oil for your skin, cooking and teeth. It's multi beneficial. 

It stimulate hair growth especially if you massage your scalp too as it increases the blood circulation to the hair follicles. Coconut oil also promotes a healthy scalp, it also helps prevent split ends & breakage which as mentioned before contributes to hair length.  

With this product, I store it in the fridge to ensure that it doesn't go all weird in the heat. It's easy as hell to use. Scrape out an amount onto your hands, rub around until the solid has turned into an oil and then deposit on to the roots, length and ends. 

Done and dusted, kippers and custard. :) 


TIP 3: Lay Off The Heat Tools.

leluroxx.blogspot.co.uk

It's in the bible of hair care that using heat tools on your strands is going to fry them to an inch of their lives. Some of us gals' will use a hair dryer, straighteners and curlers on our hair in one go. 

STOP FOR THE LOVE OF GOD. 

Leave your hair alone, lay off the straighteners and curlers, they are killing your hair. Don't forget the length and ends are actually dead so applying heat is going to make it brittle and snap off.   

If you are wanting healthier looking hair which actually grows this is main tip that I would give you because if you cut down or stop completely your hair will grow. 

I haven't used hardly any heat on my hair bar a hair dryer now and then, for over a year and my hair has grown loads and feels great. 


TIP 4: Don't Back Comb Your Hair Or Brush When Wet.

leluroxx.blogspot.co.uk


 I used to back comb the crap out of my hair when it was bleached and it all snapped off and fell out. 

As a general rule, back combing your hair is really damaging. I mean you are forcing the hair shaft backwards creating breaks in the strands which again encourages it to snap and break. 

Equally DO NOT use a brush to get your knots out of your wet hair. Use a wide tooth comb to untangle as it is less likely to snag and pull your hair. Hair is fragile when it's wet, remember that. 


TIP 5: Use Hair Products That Protect and Promote Growth.


leluroxx.blogspot.co.uk


The products that you put in your hair can really aid growth, such as oils and heat protection spray. 

I SWEAR by Moroccan Oil and use it every time I wash my hair before I dry it. 

I find that if you have fine hair but a lot of it and it just goes limp after a while, using a product to increase volume will sort that issue for you. DO NOT BACK COMB!!!

A must have to help your damaged hair is to use a heat protection spray before blow drying and also afterwards if you do have to use straighteners. 

You can see the products I use in the pics above. 


TIP 6: Blow Dry Your Hair Upside Down. 

leluroxx.blogspot.co.uk

By blow drying your hair upside down, not only does it help create volume in your hair but it also brings the blood rushing to your scalp which again aids growth. I also find that by massaging your hair again whilst doing this really helps with the lengthening process. 


TIP 7: Don't Always Wear Your Hair Tied the Same Way.

leluroxx.blogspot.co.uk


If your hair is particularly damaged you would think that by tying your hair up would benefit you growth wise. 

It actually doesn't. 

If you tie your hair up in the same way every day, the area that the hair band is sitting on will eventually break the hair strands underneath as it's under continual stress. 

The same goes for tight plaits, hair extensions and wearing your parting the same way every day. 

The more stress the hair is under the less likely it will grow. Switch your style up. 


TIP 8: Regular Trims.

leluroxx.blogspot.co.uk
  

I hate it when my hairdresser tells me that I need to have my hair cut. It makes me want to vom violently. Ha. 

So what I do now is actually trim it myself. PLEASE NOTE - if you are a very young reader, DO NOT & I repeat DO NOT CUT YOUR OWN HAIR!! 

I trim it because I roughly know what I am doing and I can control how much I cut off. I haven't had my hair cut professionally for over a year now and I just trim the ends and the split ends if any. 

By getting regular trims (which I will be doing when I get a job) cuts off the dead ends, split ends and allows your hair to grow in a fuller, healthier state. 

Having a blunt cut helps too. Just a side note.  


TIP 9: Sort Your Diet Out. 

leluroxx.blogspot.co.uk


Eating the right foods will provide your body with a great lot of vitamins and minerals that will help promote hair growth. If you find that your skin is looking gross, your nails are breaking and your hair is snapping off it could be aided by your diet. I know because this has happened to me. 

If you are lacking, take some multivitamins daily to boost your system and make you feel more human. 

Foods that help your hair grow can be; Nuts, Olives, Eggs, Salmon, Seeds, Sweet Potatoes & Avocado. 


Tip 10: Don't Dry Your Hair With a Towel. 

leluroxx.blogspot.co.uk

I have learnt never to towel dry your hair, it's just as bad as back combing it when it's wet. 

It rubs the hair up the wrong way, encourages knots and contributes to breakage. This happens because the hair gets caught in the woven fibres. Try using a silky fabric instead (as told by a fellow blogger, great tip) or even better let it dry naturally. 


These tips are fool proof, easy to conduct and fail safe. My hair is in a lot better condition now and it's growing. Remember there is no miracle cure but these tips will ensure that your hair will grow healthier, less prone to breaking and as a result you will see positive movements. 

Love 


X  

SHARE:

Thursday 17 March 2016

Bleach London | Budget Hair Products At Its Finest | Review

leluroxx.blogspot.co.uk


Hello beautiful people. 

I hope y'all are having a good week? 

My week has been quite productive compared to the usual dancing around my room, singing and taking "selfies" - I tell you what I really don't like that word, there is something cringe about it. 

Anyway, I hope you have noticed that I now have a new blog design? I love it A LOT, it looks so much more professional and I kept with the monochrome look as it is super cool. I have all my social media feeds and links on there so you guys can follow away. AND to make my year I got Placebo concert tickets, this will be my forth show now and I literally cannot wait. December cannot come quick enough. 

:) 

As mentioned before I am a bit of a creative experimentalist and I love to change my look up and make the most out of 'being different'. I like to stand out which is quite ironic for someone who gets anxious about things. Ha. 

In my 'Best Budget Beauty Buys' (link) post I mentioned the brand, Bleach London and how I have only just discovered them. 

I am SO SO SO in love with this brand already and I have only used 2 of their products because unfortunately I don't have white blonde hair any more so I am restricted as to what I can use. That said, you brunettes out there don't let the fact that you're not blonde put you off buying their products. 

There is something for everyone. That's the beauty of this brand. 

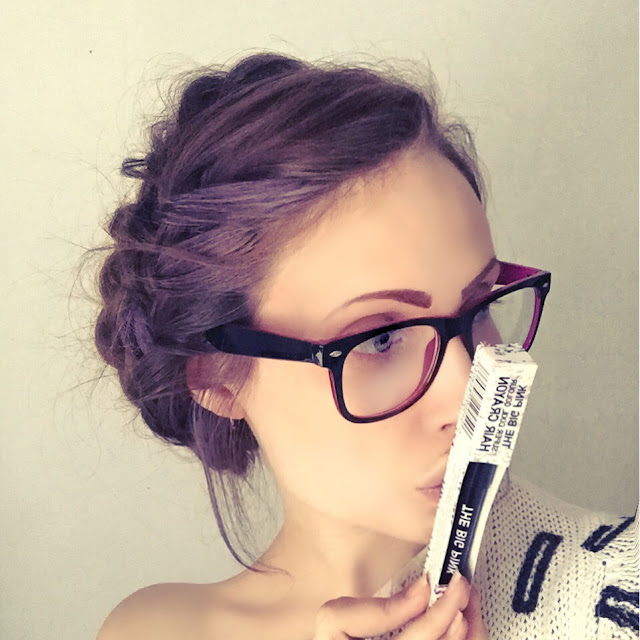
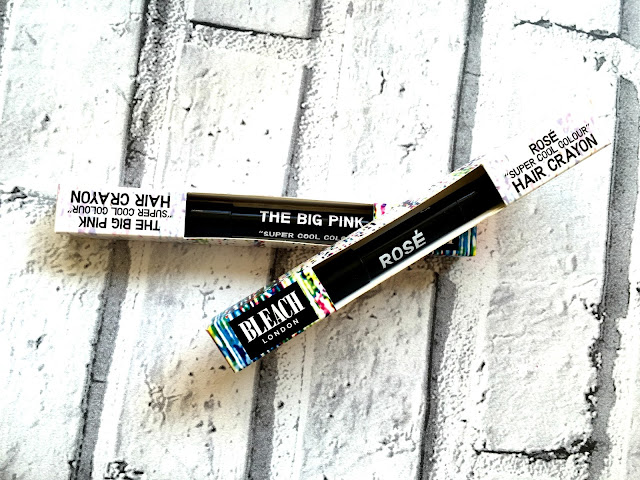
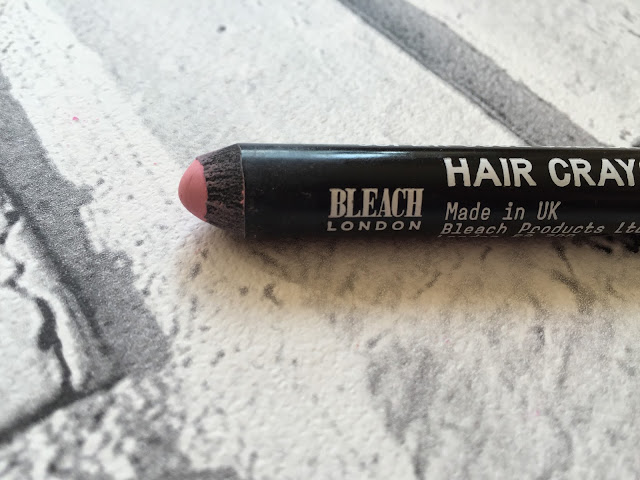
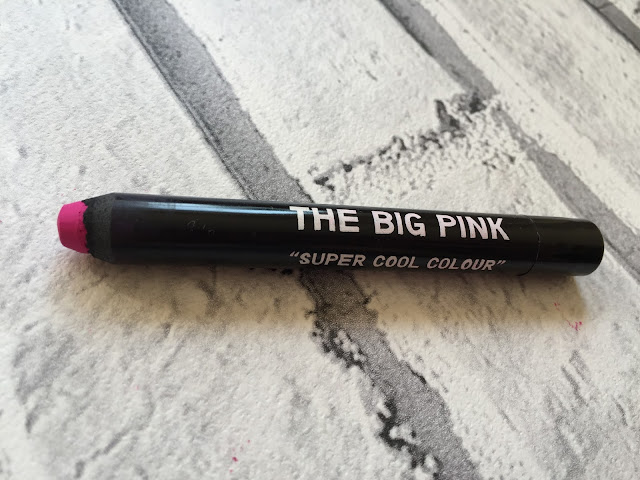
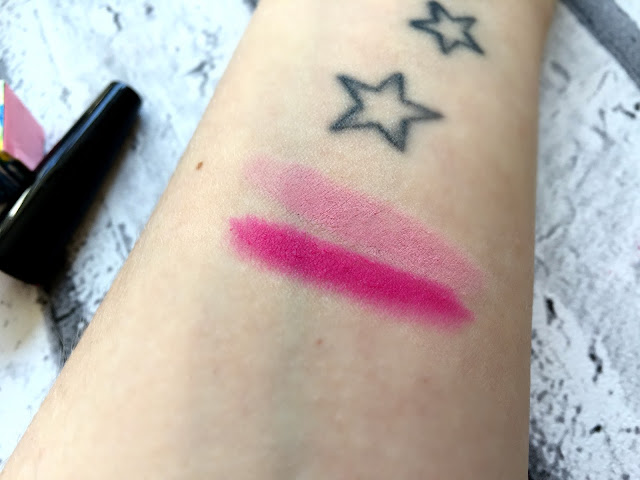
Okay, so I firstly bought their Colour Crayon 'Rose' to try out as it's only £4, so it was hardly breaking the bank. And I loved it that much it's almost gone and I had to buy another shade to add to the collection. This time I bought 'The Big Pink'. 


leluroxx.blogspot.co.uk

I love the packaging of this product with it's monochrome statement and then the pop of colour where their logo is. It's 100% Instagramable!

Now onto the part where these aren't just for the blondies out there. I used to have white, bleached blonde hair... Well it ended up being silver with the amount of purple shampoo I put on there. Actually, it ended up looking like I had a blue rinse. Ha. 

Not cool. I am now wanting to go back to white blonde again and I have looked into getting Bleach London to do it for me as they use Olaplex. 

Right now, my hair is a faded brown, think, light brown/different tones and I wanted to test these products to see how well they took on the darker haired lady. 

The consistency of this product is actually like a crayon, I thought it would be chalky and if I am completely honest with you I totally prefer the BL formula. It glides on the hair amazingly, it's super pigmented and it freaking covers my colour perfectly.

leluroxx.blogspot.co.ukleluroxx.blogspot.co.uk
leluroxx.blogspot.co.uk


  Okay, so it won't be as saturated in appearance as it would on blonde hair. Duh, the science as to why is in your face but let me tell you this product is god damn awesome on darker hair. I didn't expect the results it gave.  It was consistent, even and lasted the duration. 

leluroxx.blogspot.co.uk


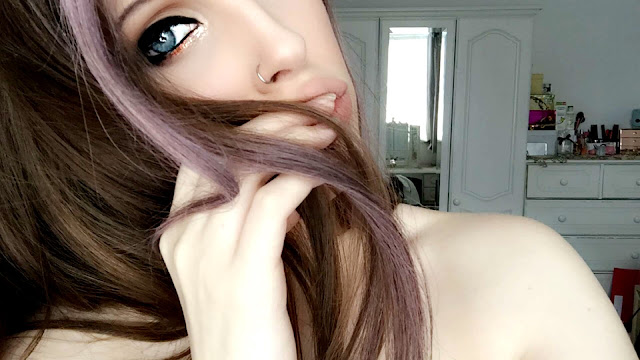
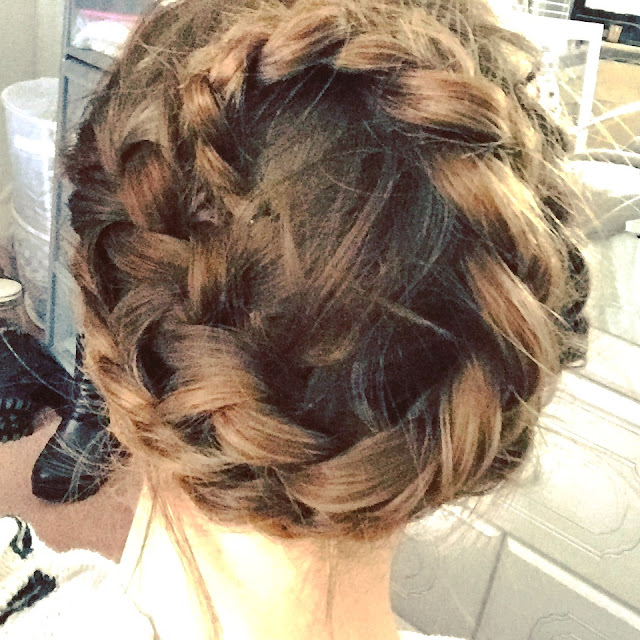
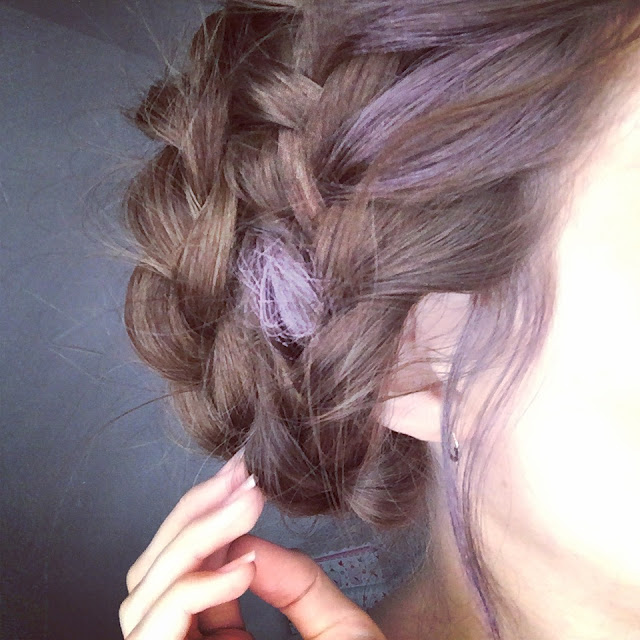
 The 'Rose' shade is a light pink but this shows up in my hair slightly lilac. It's still a pastel shade and it's perfect for the Spring and then transitioning to 'The Big Pink' for Summer and the festival season. I braided my hair to show you how cool the colour looks mixed in with the braid. This is going to be my go to look for a while now. I can just see it. 

The shocking pink in 'The Big Pink' comes off as more of a magenta on my hair but who cares, my hair looks so quirky and I am all about the quirk. 

These last in your hair for around 3-4 washes (this will be advisory for bleached hair) it came out of mine in one wash which was great and as per any colour product, residue will be left on the hair so be careful with your clothes and furniture. 

As a final note I would like to say that I did phone the salon to see how much it would cost to bleach my hair white... Right now I am not divulging that info as my joblessness won't stretch that far but their customer service is excellent and the lady I spoke to was so helpful. 

If anyone has been contemplating using these crayon's do not hesitate any longer, they won't break the bank, they come in a range of colours and they are so versatile. Go to their website for more of their products in the range. 

Let me know in the comment's what you think if you have used Bleach London. I would love your opinion. :)

Love


X  


SHARE:

Monday 18 August 2014

Fishtail Braid.// Tutorial In Pictures.

leluroxx.blogspot.co.uk


Hellooooo Ladies!! 

I finally learnt how to do a fishtail braid the other day and I was so proud of myself. I attempted to do it a few months ago and it went severely wrong. I thought it seemed really hard when I first gave it a go, but trust me once you have tried it a few times it's actually super simple. 

I understand it would be much better to watch this on a video so if you would like me to do a tutorial on my YouTube channel then let me know. Today I will placing step-by-step photo's of how to create this look. I had to do it on my web camera as I didn't have anyone to take the photo's for me so excuse the quality. 

Hopefully through following these easy steps you will be able to create this braid yourselves in no time. 

Here we go. 

Firstly, you will need to comb/brush your hair through to ensure your hair is knot free. You will thank me after :). 

I used a Tangle Teezer to get my bad boy knots out and there were a lot of them. 

leluroxx.blogspot.co.uk


Next I would give the roots a little back comb. I don't have to explain the process, y'all know how to do it. 


leluroxx.blogspot.co.uk


Then you will need to pull all your hair to one side and divide it into two sections as shown. 

leluroxx.blogspot.co.uk


Whilst holding on to both sections, take a small section from underneath of one of the sections.

leluroxx.blogspot.co.uk


Then pull the underneath piece of hair to the front of the other section.

leluroxx.blogspot.co.uk


Like so. 

leluroxx.blogspot.co.uk


Then repeat from the other side. So Again from the opposite side this time pull an underneath section.


leluroxx.blogspot.co.uk


Then pull it across to the front of the opposite side. 

leluroxx.blogspot.co.uk


This is what you should now have. Like an 'x' shape.


leluroxx.blogspot.co.uk


And then keep repeating the process until you have reached the end of your hair. 

leluroxx.blogspot.co.uk

leluroxx.blogspot.co.uk

leluroxx.blogspot.co.uk

leluroxx.blogspot.co.uk

leluroxx.blogspot.co.uk

leluroxx.blogspot.co.uk


leluroxx.blogspot.co.uk

leluroxx.blogspot.co.uk


This is how it should be looking as you're going through your hair. 

leluroxx.blogspot.co.uk


And this is how the finished product should look.

:) 

leluroxx.blogspot.co.uk


Pull the sections out a little so the braid isn't so tightly plaited. And voilĂ . 


leluroxx.blogspot.co.uk

Please let me know if you have found this hard to follow and like I said I will do a video tutorial for you. 

I hope you enjoyed my take on this super cool braid.

Until next time....

SHARE:
© LoneWolfLeya. All rights reserved.
Blogger templates by pipdig