Tuesday 26 August 2014

Playboy Makeup. #PlayboyPinUpChallenge


Ladies this is a different post from normal as I have been kindly sent some 'Playboy' makeup gifts from Aqua PR.

They are hosting a 'Playboy Pin Up Challenge' where they want to see what I can create with the range of cosmetics they have sent me. It was really kind of them to send me these and I will be giving a mini review on what I thought of these products and then showing you the look I created. 

Firstly I will start with the mascara. 


This is the Playboy 'Sleek Lashes' lengthening mascara. The box packaging is super pretty and eye-cathing. I love the colour too. The actual mascara packaging is simple yet the brand is clearly visible and it makes the logo stand out.

I always have a problem with mascaras... Yes, in the fact that they never work on my eye lashes. My lashes are the worst, they never curl, they never thicken and they never lengthen with a mascara. Nothing has ever worked on them.

Unfortunately this mascara wasn't any different.


Now just because it didn't make a difference to my lashes doesn't mean it wouldn't for anyone else. I just have stubborn ones. It did sit nicely on my lashes and didn't feel heavy, but for me it did the same as the rest and darkened my lashes and nothing more.


Next in the package was the lipstick (I was quite excited by this).


Again the box packaging retains the same design as the mascara but this time in red and this lipstick is called 'Perfect Kiss' intense lipstick. The lipstick packaging carries the same branded design. 

 I didn't have a clue on what the colour was going to be, I had seen on their twitter account @PlayboyMakeupUK a bright pink lipstick which looked cute so I thought I might get that. 

They know me so well :) 

It was a funky red one!! 


      I didn't know they did a red one so I was super excited to try this as I do love a red lipstick. It smelt really nice too, like perfume scented. I did think it was going to be a matte finish but it wasn't. I love matte lipsticks as for me they give a better finish on my lips, this one was a little glossy for my liking but the colour payoff was brilliant and true to the lipstick itself. It felt nice on my lips too but for me I don't like a shine. I will be wearing this again though as it's a really good lipstick. 

I don't know how much these products retail at, but this lippy would definitely be worth buying. In any of their colours!! I want the bright pink one next. 


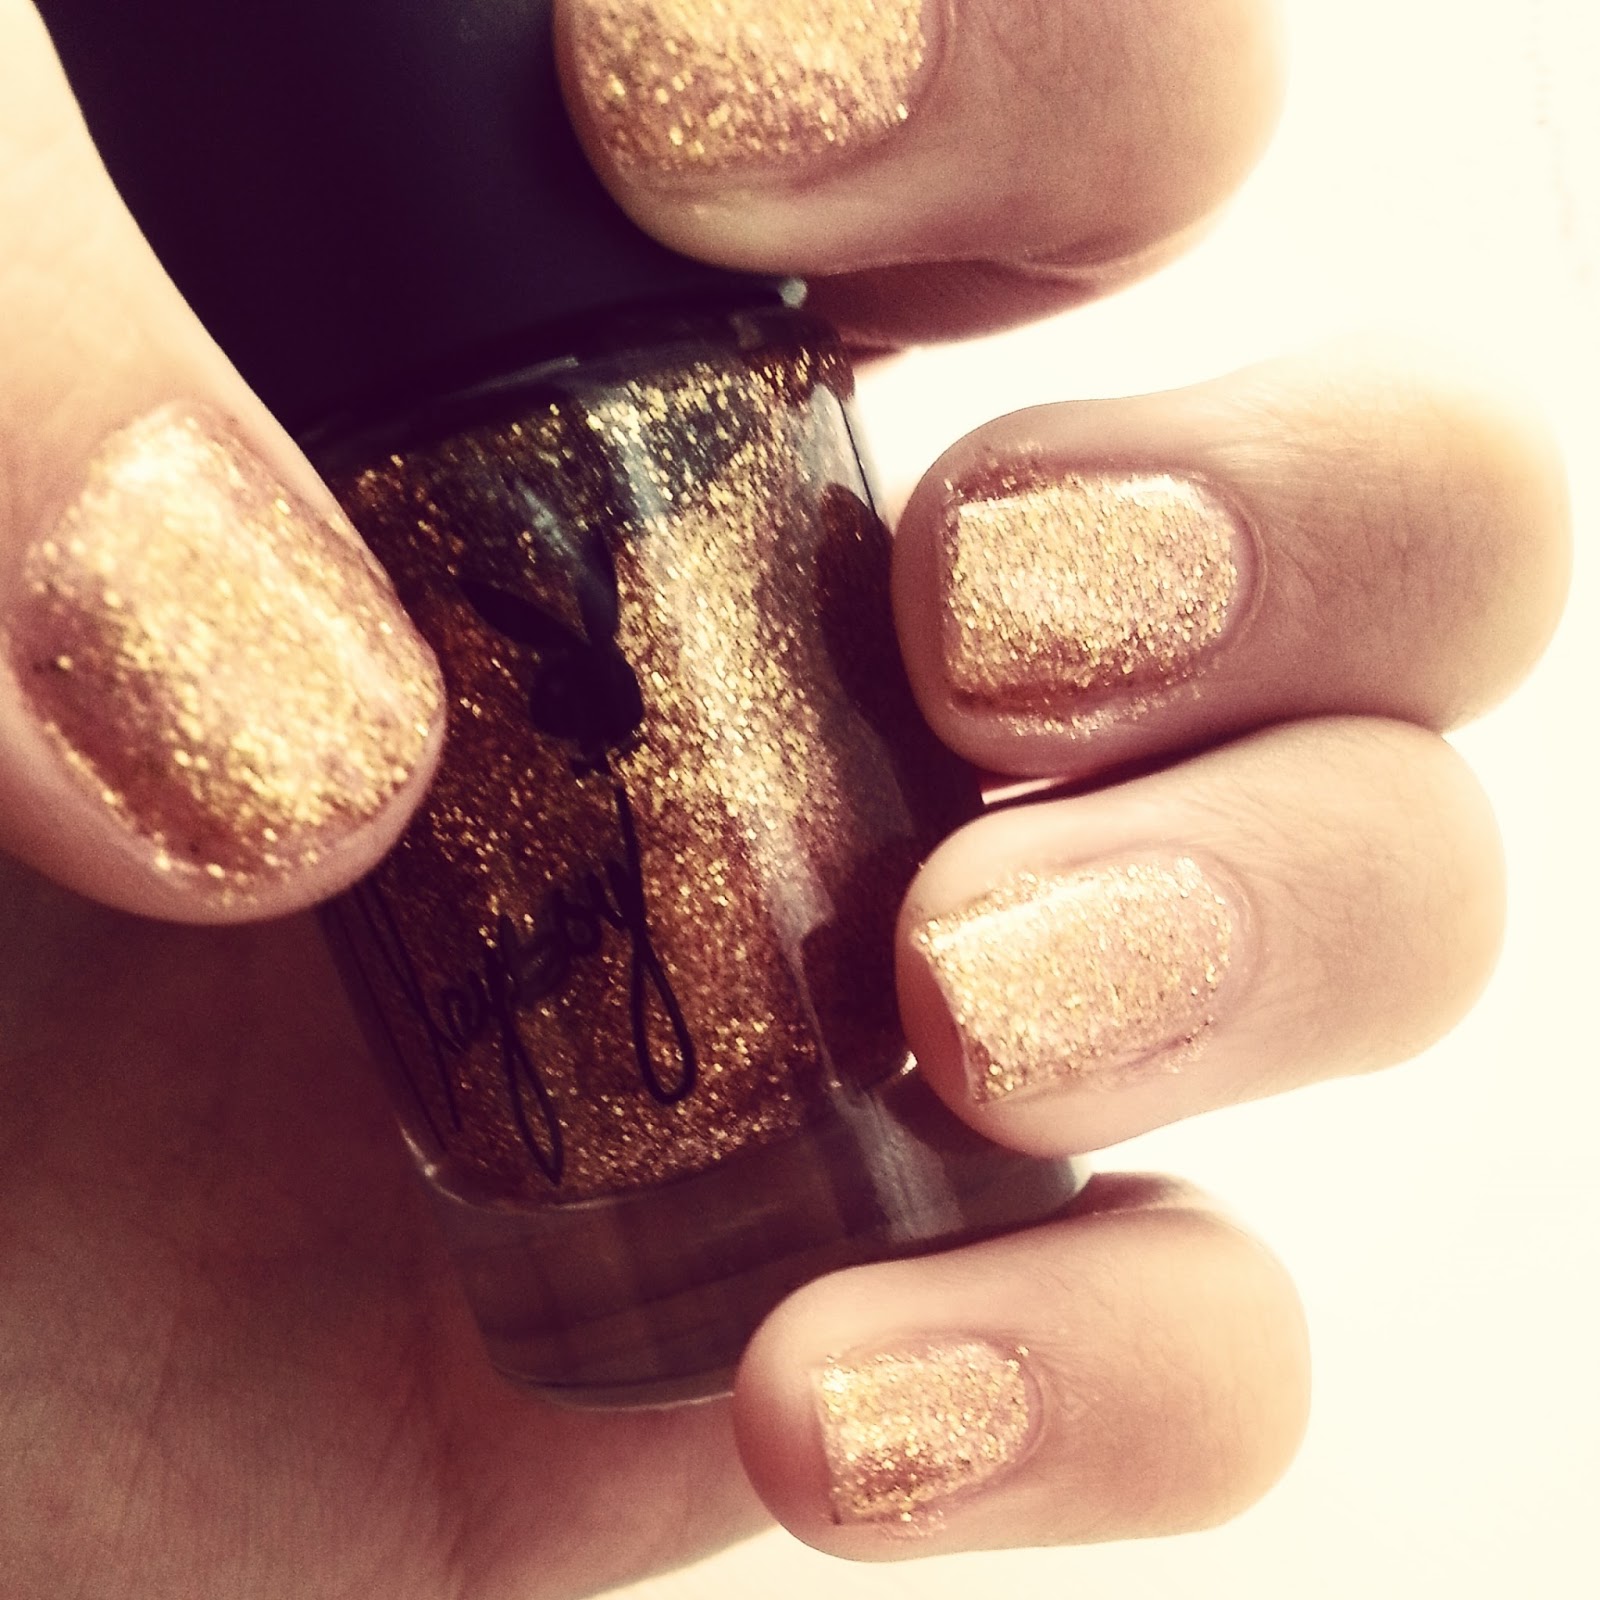
Finally I was sent an awesome nail polish. 


I love anything glittery and shiny. And I love this colour.
The polish is called 'Billionaire' which is a rather fitting name for the shade it is. It applies really nicely and there is a lot of glitter which is good, I don't like it when the glitter is sparse. The only downfall I will say is that it takes FOREVER to dry and I have smudged it on a couple of nails now. If you're in a rush this won't be the polish for you. If you aren't in a rush though this nail varnish is awesome. The colour is so nice when dried and it's subtle in appearance but the when the flecks catch the light it glistens. 

I really like this polish a lot. It dries as a warm gold and would be perfect for Autumn/Winter. Oh and CHRISTMAS!!


Now on to the look I created with the products they sent me. I have gone for a vampy/classic pin up look, which is my favourite and the products they sent me work very well with this. 

I have done a step by step in picures. 


#PlayboyPinUpChallenge


(I would like to apologise for the picture quality. It was raining all day where I live in the UK and it was soooo dark in my room. I worked with what I had.)

I have applied my base here. I had a tester of Clarins BB cream so I used that and my trusty Collection 2000 concealer in 'fair' and blended with a mini Bobbi Brown brush.

Ha, my eyebrows are that light it looks like I haven't got any!!


Next I fill in my eyebrows. I have switched to using eyeshadow and an angled brush rather than a pencil to provide a more natural look. I went for heavier eyebrows for this look today.


I then started drawing on my 'cat flicks' with an eye liner pen. I used the Eyeko felt tip style liner. 


I then went into my tight line and waterline with my Rimmel 'Scandleyes' khol pencil liner to define my eyes and blend in the lash liner. 


The next step is to use the mascara on the tops of my lashes to darken them and fill in any gaps. Here I am using the Playboy mascara that I was sent. 


This is my completed eye look. I took the liner around the bottom of my eyes to create a more feline look and it makes the blue really stand out. 


This is what it looks like with the eyes closed. A clean eye liner line. Plain and simple. 


To finalise the makeup look I took my Playboy lipstick that was sent to me and filled my lips in. First I used my Rimmel lip liner to line my lips as it stops the lipstick from bleeding.


The finishing touches to my vampy pin up look were my nails and again I used the nail varnish that was sent to me from Aqua PR.


My Completed Look.


I hope you enjoyed my little tutorial/ Playboy Pin Up Challenge look. 

If you like any of these products that I have used contact @PlayboyMakeupUK to find out where your nearest stockist is. 

SHARE:

Thursday 21 August 2014

Essentials // My Top 5 August Faves

leluroxx.blogspot.co.uk


Since I have been home quite a lot due to not having a job at present, I have been using certain things on a daily basis. 

Four of the things are beauty related, one not so much, ha, but I had to include it as I use it all the time since I bought it. 

As I have been spending more and more time extracting myself from civilisation and cooped up in my bedroom like a loser, I have not really wanted to put a full face of makeup on. I feel it's a waste of makeup, so if I have to pop into my local town quickly (usually to get my guinea pigs lettuce)I will reach for these certain items. Most of the time I haven't been wearing any make up at all which has been nice, but I also feel incredibly disgusting. 

So what I am about to show you are currently... Well for the month of August anyway, my top 5 faves. 

Lets go. 


1.

Garnier Skin Naturals Micellar Cleansing Water.

leluroxx.blogspot.co.uk

I have been using this on a daily basis since I bought it. I use it mainly at night when I am removing my makeup, but I also use it sometimes in the morning to give it an extra clean. 
I used to use makeup wipes but then I thought I'd try this out as it was something different and I actually really like it. I use flat cotton pads and splash this stuff all on it and proceed to remove my makeup. It's a lot kinder to my skin than some of the wipes I had previously been using as it scratched my skin. It's really refreshing too and really good at getting rid of my makeup. 

The only thing I would say is that you have to go over your eye makeup up quite a bit to remove it. Well you do if you wear dark makeup around your eyes like me. Other than that it's perfect.

I got mine from Savers (cheap store in the UK) at £2.99 and apparently it lasts up to 200 uses. It's super cheap and does the job well. 


2.

Pure B.B Cream.


leluroxx.blogspot.co.uk

I have been wanting a B.B cream for the last few months but I didn't want to buy anything too expensive in case I didn't like it. I know the coverage with B.B creams aren't amazing, which is the point in them I suppose as it's a blemish balm. 

I picked this one up in Savers again for around £1.70 which is quite cheap, so I wasn't expecting great things from it. I just wanted to try it out. I wanted B.B cream for the days that I am not wearing a full face of makeup but didn't want to look like death either. Just something to even out my skin tone, conceal blemishes and make me look a little more alive. Something light. 

I bought this in the shade 'light' and it says on the box that it...

  • Evens your skin tone.
  • Blurs imperfections.
  • Smooths fine lines.
  • Hydrates the skin.
  • And, contains vitamin E & mineral pigments.

The colour that comes out of the tube is actually quite dark for a 'light' shade and when I first used it I really didn't like it. I used my fingers to blend it into my face and found the coverage was patchy and it didn't really hide much. 

I tried it again the next day with a makeup brush to blend it into my face and this time the coverage was even and it gave me a nice glow. It is a tiny bit darker than my pale skin tone but it gives me a nice colour. The consistency is quite thick so you don't need to apply much but it does dry quite sticky (on my skin anyway)which I don't particularly like. 

All in all for a cheap B.B cream it's pretty good. And considering I was just trying it out it's not bad for me, especially when I am only wearing it around the house to make myself look more presentable. 


3.

MUA 'Undress Me Too' Eyeshadow Palette.


leluroxx.blogspot.co.uk


I bought this from Superdrug (UK drugstore) as I wanted to expand my eyeshadow palette collection and I loved the neutral tones. Obviously this isn't a high end palette but I thought the packaging looked clean and pretty and I wanted to work more with earthy colours. 

I think this palette was around £4 and it comes with 12 shades, mixing in with cool greys, soft neutrals and gold metallics. They are actually quite pigmented for a cheaper brand, they aren't highly pigmented but very workable nonetheless. 

I have been mainly using it on my eyebrows recently to create a more softer, natural look than my current pencil gives. I have been using an angled brush to apply the two bottom, right shades. The lighter brown first and then the darker shade to define. 
It works really well on the brows as well as the eyes.

What we have here is a multi-tasking product. 


4.

Benefit 'Her Glam' Makeup Kit.


leluroxx.blogspot.co.uk


This was bought for me as a gift from my Auntie last Christmas and I have only just started to use it. 

I am unsure how much it was due to me stating that it was a present but I have been using this with my B.B cream. 

As you can see the little angled brush is missing as that is what I have been using on my eyebrows so that's in my palette. Once my base is done I have been using the pictured illumination liquid. Moon Beam I believe. This I have been using just above my cheekbone to give it a natural looking highlight and it makes my face seem dewy. Then I apply the blusher (next to the brush), I don't use that god awful brush though as I don't want a stripe of colour. Ha. 

I will be honest with you. I don't find the kit super amazing. I don't know if I would find other products in their range much better, but I am just not feeling it. Considering as they are quite expensive I would hope for better in their full size versions. 


5.

New Look Sealed Floral Cup (with straw).


leluroxx.blogspot.co.uk


I LOVE this cup soooo much. I have literally been using this cup every day since I bought it!!! And yes, of course I have washed it. I am weird... But not that wierd. :) 

I originally bought one of these with pineapples on a few months back and when I got it home and used it I noticed it was cracked inside so the liquid was coming through. I had to take it back and there were no more left to replace it. I was very saddened by this news.

THEN... I went back in this month and this was the last one left and I love the design so much better. It is definitely a 'me' cup!! I love the floral design and the colours used and it's great if you're clumsy like me and spill drinks. Why you ask? Well that's because the top is sealed and if you knock it over no liquid comes out. 

I got this with money I had left on a Christmas voucher and it cost £5.99. My New Look store isn't the biggest so you should find it in the bigger cities. 


There you have it, my top 5 August faves. 
I would highly recommend all the products I have featured in this post today, even the Benefit kit as there are some useful products to use.  

Go and buy ladies :) 

SHARE:

Monday 18 August 2014

Fishtail Braid.// Tutorial In Pictures.

leluroxx.blogspot.co.uk


Hellooooo Ladies!! 

I finally learnt how to do a fishtail braid the other day and I was so proud of myself. I attempted to do it a few months ago and it went severely wrong. I thought it seemed really hard when I first gave it a go, but trust me once you have tried it a few times it's actually super simple. 

I understand it would be much better to watch this on a video so if you would like me to do a tutorial on my YouTube channel then let me know. Today I will placing step-by-step photo's of how to create this look. I had to do it on my web camera as I didn't have anyone to take the photo's for me so excuse the quality. 

Hopefully through following these easy steps you will be able to create this braid yourselves in no time. 

Here we go. 

Firstly, you will need to comb/brush your hair through to ensure your hair is knot free. You will thank me after :). 

I used a Tangle Teezer to get my bad boy knots out and there were a lot of them. 

leluroxx.blogspot.co.uk


Next I would give the roots a little back comb. I don't have to explain the process, y'all know how to do it. 


leluroxx.blogspot.co.uk


Then you will need to pull all your hair to one side and divide it into two sections as shown. 

leluroxx.blogspot.co.uk


Whilst holding on to both sections, take a small section from underneath of one of the sections.

leluroxx.blogspot.co.uk


Then pull the underneath piece of hair to the front of the other section.

leluroxx.blogspot.co.uk


Like so. 

leluroxx.blogspot.co.uk


Then repeat from the other side. So Again from the opposite side this time pull an underneath section.


leluroxx.blogspot.co.uk


Then pull it across to the front of the opposite side. 

leluroxx.blogspot.co.uk


This is what you should now have. Like an 'x' shape.


leluroxx.blogspot.co.uk


And then keep repeating the process until you have reached the end of your hair. 

leluroxx.blogspot.co.uk

leluroxx.blogspot.co.uk

leluroxx.blogspot.co.uk

leluroxx.blogspot.co.uk

leluroxx.blogspot.co.uk

leluroxx.blogspot.co.uk


leluroxx.blogspot.co.uk

leluroxx.blogspot.co.uk


This is how it should be looking as you're going through your hair. 

leluroxx.blogspot.co.uk


And this is how the finished product should look.

:) 

leluroxx.blogspot.co.uk


Pull the sections out a little so the braid isn't so tightly plaited. And voilà. 


leluroxx.blogspot.co.uk

Please let me know if you have found this hard to follow and like I said I will do a video tutorial for you. 

I hope you enjoyed my take on this super cool braid.

Until next time....

SHARE:

Thursday 14 August 2014

H&M Dress Of The Month // And Some Other Vitals


It's no secret that I am a massive fan of H@M clothing!! 
They always have some really nice pieces in there and I could literally spend a fortune. 

There is one item of clothing that really stood out to me when I last visited the store (before my birthday) and one of which I actually regret not buying. 

The reason that I did not buy I will tell you shortly. 

Nevertheless, I did and have fallen in love with this item and I think it's something that you girls would want in your wardrobe. 

It's super pretty and eye-catching. 

And the item in question is this dress...


I really love this dress. It's a full sleeve, super low back bodycon dress in a black and white, paint swipe/abstract effect. I am wearing either XS or S in size here, I cannot remember as I tried both. The fit is really good and it's only £14.99.

The downfall to this dress though and the reason why I never brought the dress in the end as much as I loved it, was because the material was seriously thin and under bright lights the fabric became see through. 

The dress is backless so wearing a bra is not an option, when I removed my bra and looked in the mirror you could seriously see EVERYTHING including nipple!! This is not what you want to see when trying a stunning dress on. I turned around and the same thing happened in the bum area...You could see my underwear. 

I was gutted because there was no way around the situation. I mean if you are comfortable with that kind of exposure. Cool. But I wasn't and couldn't bring myself to buy it and take the risk. If the material was a little thicker it would have been perfect. 

I am in two minds now whether to still get it because I had a lot of compliments on the pictures above. I just don't know if I should risk it. 

With all this said, it is still a super hot dress and if you can pull it off get it. I don't know what it would be like on a night out because it is dark so you could get away with see throughness. The print is so eye-catching but not seriously in your face and teamed with red lipstick it projects a really classy look. 

Definitely my dress of the month purely on appearance!!


SOME OTHER VITALS THAT I PICKED UP :) 


H&M Black Bralet. 
Brought it for around £12.99 which is a steal. It's a classy bra that would go amazingly under a slinky shirt/blouse.


H&M Knuckle Ring.

Brought in the sale for £2. I love the Aztec style/colouring of this piece. 


H&M Sweat Top.

I love their sweat top range they have some really cool designs and they are only £5.99 which shocked me a little as I thought they would have been around the £14 mark. Bargain. I have a couple of these now. 

This is in a Size Large.


The fit. Slightly slouchy and more of a lounge piece.


I Love it. 


If you enjoy reading my posts don't forget to subscribe to my blog on here or alternatively Google+ or Bloglovin'

I would be most grateful!!! 

X
SHARE:
© LoneWolfLeya. All rights reserved.
Blogger templates by pipdig