Thursday 25 August 2016

Easy How To Side Boxer Braid - inc Video | Garnier Beauty Blogger Exclusive Box | How I Keep My Hair Healthy And Long.


beauty blogger, boxer braid, wedding hair, festival hairstyle, garnier, honey treasures, hair care, how to, hair tutorial, new look, hair rings,


Hello my beautiful little readers!! 

I hope everyone is fine and dandy?! 

I am actually meant to be in the bath right now but I am running so behind today as I decided to sing for hours on Smule and then I did an unplanned video for this which I have not long edited. I am now waiting for it to upload to YouTube. 

I am going to fake tan tonight. 

*GASPS*

I know right, I rarely fake tan because sometimes I just feel it's quite over rated. However I was sent a kit from Fake Bake which is unreal and I am reviewing it for Monday soooo I need to "chop chop" and get that golden glow. I really hope to the lordy that it doesn't go orange. I don't want no tide marks thank you very much. 

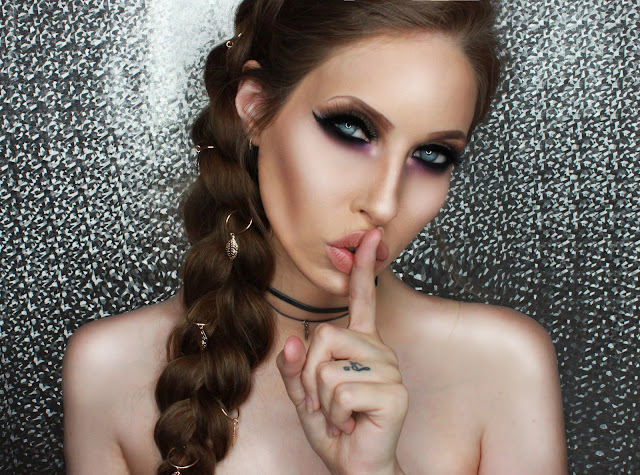
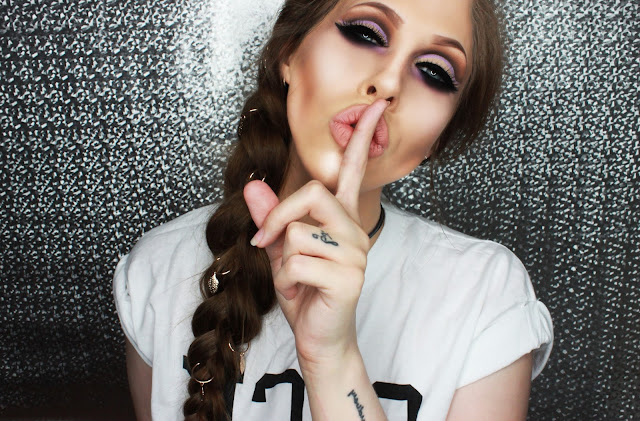
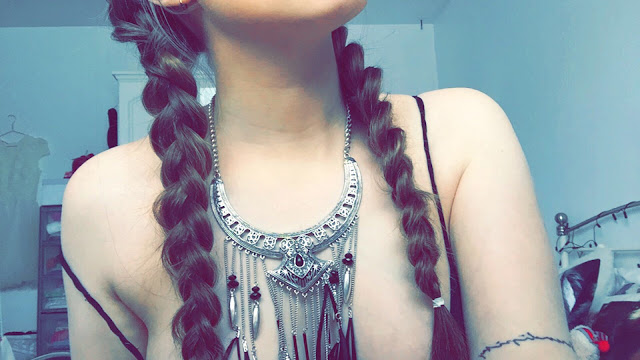
Quite recently I have been wearing my hair in either boxer braid pigtails or just a mahooosive one stuck to the side of my neck. 

I have had SO many people compliment me on it in the street and via social media and have asked me how I do it. 

I was going to do a set of pictures as a tutorial but I thought it may be easier if I make a video in which you can watch and try and master it yourself. 

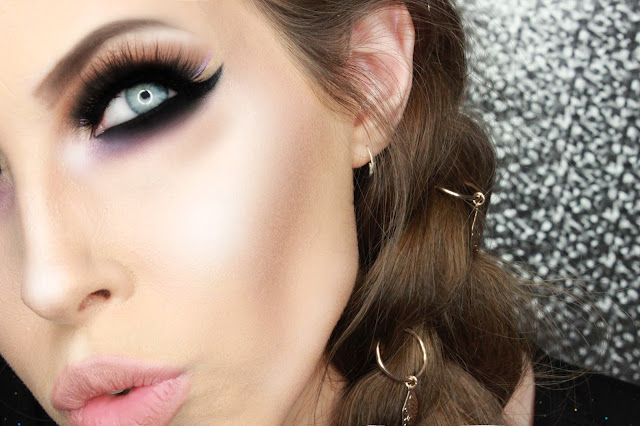
Once you have the hang of it it's so quick and easy to do and re-create. You can really jazz this look up by putting glitter in your hair (perfect for festivals or gigs), weaving ribbon through the plait or adding hair rings like I do. 

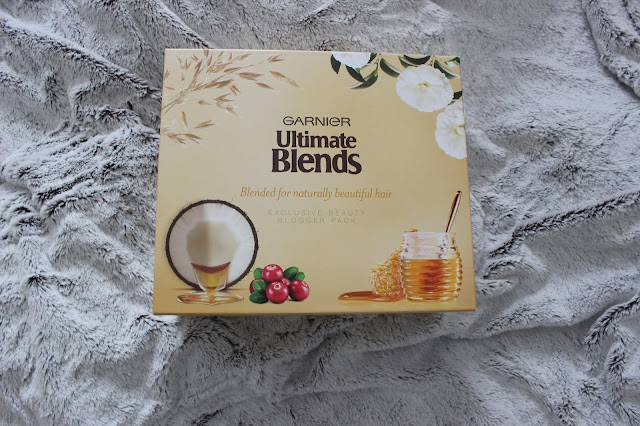
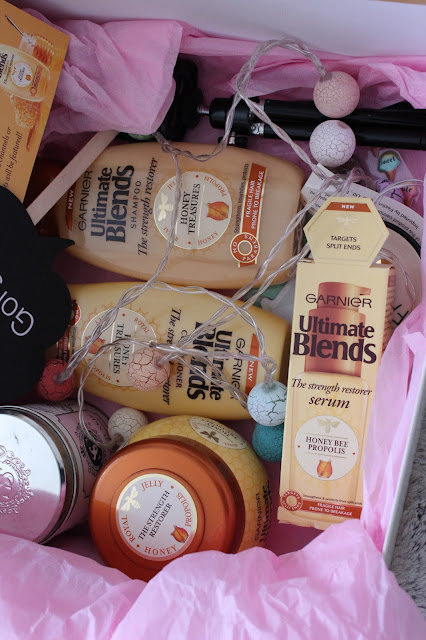
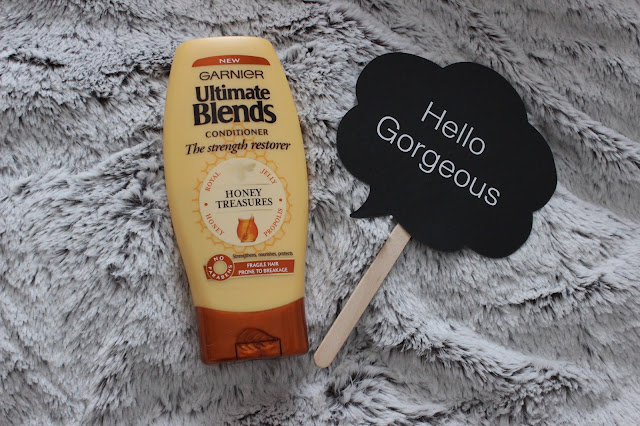
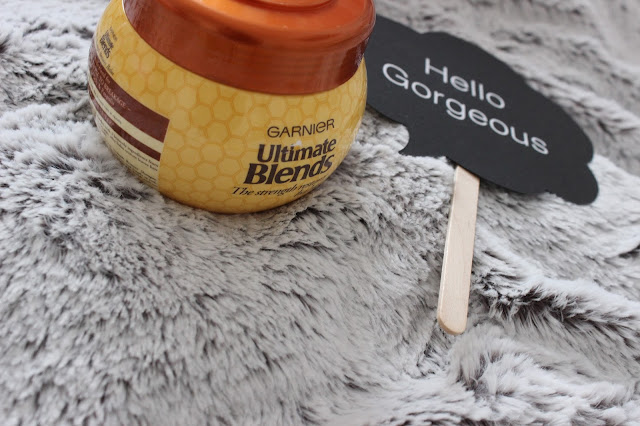
I thought I would also mention the Gariner Beauty Blogger exclusive box which I was kindly sent by Garnier themselves. The reason for this mention is because they sent me ALL the products that I LOVE to use on my hair. All four products are my go to hair care items and will be for a long while. 

It's the Honey Treasures range and my gosh doesn't it smell super amazing. Just think of a massive honey pot and you're diving right into that badboy and basking in the glory of the sweet scent and the luxurious feel. That's EXACTLY what your hair is like after washing with these products. 

Oh yeah, a little warning about hair products because A LOT of people do not know about this. When buying ANY hair product please check the ingredients... This is not a drill, I repeat this is not a drill... Most of the brands ingredients contain a harmful substance. 

Look out for METALLIC SALTS!

They will ruin your hair like nobody's business, look out for anything like Magnesium or anything metal related on the packaging. I have discovered that John Frieda's Brilliant Brunette range contains it and when you go to colour treat your hair, the chemicals have a field day. 


You're welcome. :) 


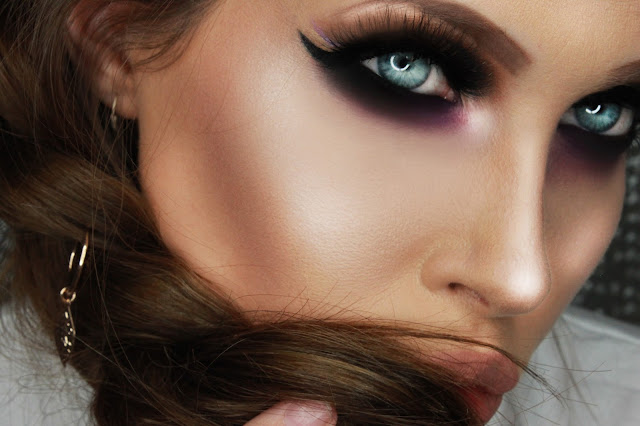
So here's the tutorial for you via video and I will insert some pics below of the finished look and my Garnier Beauty Blogger box. 


beauty blogger, boxer braid, wedding hair, festival hairstyle, garnier, honey treasures, hair care, how to, hair tutorial, new look, hair rings,
beauty blogger, boxer braid, wedding hair, festival hairstyle, garnier, honey treasures, hair care, how to, hair tutorial, new look, hair rings, vagas nay, violet voss, holy grail palette, beauty bay, makeup artist,
beauty blogger, boxer braid, wedding hair, festival hairstyle, garnier, honey treasures, hair care, how to, hair tutorial, new look, hair rings, vagas nay, violet voss, holy grail palette, beauty bay, makeup artist, mermaid hair,
beauty blogger, boxer braid, wedding hair, festival hairstyle, garnier, honey treasures, hair care, how to, hair tutorial, new look, hair rings, vagas nay, violet voss, holy grail palette, beauty bay, makeup artist,
beauty blogger, boxer braid, wedding hair, festival hairstyle, garnier, honey treasures, hair care, how to, hair tutorial, new look, hair rings, damaged hair care


 I hope you have enjoyed this post, I really do love editing videos. Someone buy me a Mac so I don't have to keep pinching my brothers. Ha. 

Let me know if you have managed to do your own boxer braid by using this tutorial and let me know what you would like to see next. 

I love to explore new ideas.


Have a super happy Bank Holiday weekend (UK) and normal weekend for the rest of you. 


P.S. I might be going to the Safari Park again next week... Hella yeah!!!


If you want to see more of me (and I hope you do) you can follow my blog on bloglovin' here


You can catch me over on the following social media channels.


Twitter: Leluroxxblogger

Instagram: Leluroxxblogger

Facebook: Leya.Hutton

YouTube: Leluroxxblogger

Snapchat: Blackeyedfox 

Until next time...


leluroxx.blogspot.co.uk


SHARE:

Monday 21 March 2016

Damaged Hair | 10 Hair Care Tips To Get Healthier Locks.


leluroxx.blogspot.co.uk


"Hello... It's me... I've been wondering if after all these years, my hair would grow to my feet".

The answer to that is simply a no. 

"why is that" you ask? 

The only logical answer to that is, if you have damaged hair it's going to take a while to fix it, before you even think of it growing longer.  

Sounds like a horror story right? Have no fear though because I am here to help you lovely lot on how you can transform your damaged locks to healthy strands of goodness that will grow before your eyes. 

I talk from experience and this is why I am writing this post to help those who have over processed their hair either through, heat damage, colour damage and the dreaded back-combing. 

I have done it all, bleached the hell out of hair, full on blasted it with a lot of heat that could rival the sun and back-combed my hair to an inch of its life. All these things are super bad for your tresses and if you think about it, deep down you KNOW it's bad news but we all still do it. 

I have worked at hairdressers for many years and I have learnt A LOT about hair, I have learnt my lessons and I have advised others. 

Blonde hair especially needs extra care when it comes to keeping it in healthy condition due to the bleach/peroxide being used and brunettes... Well you can see damage easily - particularly split ends.  

I had my hair stripped a year ago, it was almost black in colour and to lift it I needed a bleach bath (hardcore) full head of highlights & tint... And then the worst was yet to come. 8 Inches off my hair. 

I was almost sick in my mouth, my hair disintegrated in the foils and I had to have a lot cut off. 

leluroxx.blogspot.co.uk
BEFORE

leluroxx.blogspot.co.uk
AFTER

Since that day I have taken my own advice to look after my hair properly, to let it grow healthier and longer. 

I do not want to experience that again. 

So, if you are like me and want longer hair, follow my tips and you will be on your way to permanently removing those extensions. 


Tip 1: Use The Correct Shampoo & Conditioner.
 

leluroxx.blogspot.co.uk


It is really important to use the correct shampoo and conditioner (separate bottles not a 2 in 1) for your hair type. Obviously you are reading this so your hair is currently damaged in some form or another. You need to cater to this. I am currently using the Garnier Ultimate Blends 'Honey Treasures' Shampoo & their 'Nourishing Repairer' Conditioner. These are specifically for those who have dry, damaged or brittle hair. 

Do not wash daily as it strips your hair and scalp of essential natural oils. It causes more harm than good. 

The importance of getting this basic step correct is ten fold because these types of shampoo and conditioner's will be adding and replacing essential nutrients, proteins & repairing the hair shaft. This in turn helps prevent those ghastly split ends which causes the hair to snap and lose length.


Tip 2: Coconut Oil. 

leluroxx.blogspot.co.uk


This is one of the most inexpensive items you can buy that is super good for your hair. You can also use coconut oil for your skin, cooking and teeth. It's multi beneficial. 

It stimulate hair growth especially if you massage your scalp too as it increases the blood circulation to the hair follicles. Coconut oil also promotes a healthy scalp, it also helps prevent split ends & breakage which as mentioned before contributes to hair length.  

With this product, I store it in the fridge to ensure that it doesn't go all weird in the heat. It's easy as hell to use. Scrape out an amount onto your hands, rub around until the solid has turned into an oil and then deposit on to the roots, length and ends. 

Done and dusted, kippers and custard. :) 


TIP 3: Lay Off The Heat Tools.

leluroxx.blogspot.co.uk

It's in the bible of hair care that using heat tools on your strands is going to fry them to an inch of their lives. Some of us gals' will use a hair dryer, straighteners and curlers on our hair in one go. 

STOP FOR THE LOVE OF GOD. 

Leave your hair alone, lay off the straighteners and curlers, they are killing your hair. Don't forget the length and ends are actually dead so applying heat is going to make it brittle and snap off.   

If you are wanting healthier looking hair which actually grows this is main tip that I would give you because if you cut down or stop completely your hair will grow. 

I haven't used hardly any heat on my hair bar a hair dryer now and then, for over a year and my hair has grown loads and feels great. 


TIP 4: Don't Back Comb Your Hair Or Brush When Wet.

leluroxx.blogspot.co.uk


 I used to back comb the crap out of my hair when it was bleached and it all snapped off and fell out. 

As a general rule, back combing your hair is really damaging. I mean you are forcing the hair shaft backwards creating breaks in the strands which again encourages it to snap and break. 

Equally DO NOT use a brush to get your knots out of your wet hair. Use a wide tooth comb to untangle as it is less likely to snag and pull your hair. Hair is fragile when it's wet, remember that. 


TIP 5: Use Hair Products That Protect and Promote Growth.


leluroxx.blogspot.co.uk


The products that you put in your hair can really aid growth, such as oils and heat protection spray. 

I SWEAR by Moroccan Oil and use it every time I wash my hair before I dry it. 

I find that if you have fine hair but a lot of it and it just goes limp after a while, using a product to increase volume will sort that issue for you. DO NOT BACK COMB!!!

A must have to help your damaged hair is to use a heat protection spray before blow drying and also afterwards if you do have to use straighteners. 

You can see the products I use in the pics above. 


TIP 6: Blow Dry Your Hair Upside Down. 

leluroxx.blogspot.co.uk

By blow drying your hair upside down, not only does it help create volume in your hair but it also brings the blood rushing to your scalp which again aids growth. I also find that by massaging your hair again whilst doing this really helps with the lengthening process. 


TIP 7: Don't Always Wear Your Hair Tied the Same Way.

leluroxx.blogspot.co.uk


If your hair is particularly damaged you would think that by tying your hair up would benefit you growth wise. 

It actually doesn't. 

If you tie your hair up in the same way every day, the area that the hair band is sitting on will eventually break the hair strands underneath as it's under continual stress. 

The same goes for tight plaits, hair extensions and wearing your parting the same way every day. 

The more stress the hair is under the less likely it will grow. Switch your style up. 


TIP 8: Regular Trims.

leluroxx.blogspot.co.uk
  

I hate it when my hairdresser tells me that I need to have my hair cut. It makes me want to vom violently. Ha. 

So what I do now is actually trim it myself. PLEASE NOTE - if you are a very young reader, DO NOT & I repeat DO NOT CUT YOUR OWN HAIR!! 

I trim it because I roughly know what I am doing and I can control how much I cut off. I haven't had my hair cut professionally for over a year now and I just trim the ends and the split ends if any. 

By getting regular trims (which I will be doing when I get a job) cuts off the dead ends, split ends and allows your hair to grow in a fuller, healthier state. 

Having a blunt cut helps too. Just a side note.  


TIP 9: Sort Your Diet Out. 

leluroxx.blogspot.co.uk


Eating the right foods will provide your body with a great lot of vitamins and minerals that will help promote hair growth. If you find that your skin is looking gross, your nails are breaking and your hair is snapping off it could be aided by your diet. I know because this has happened to me. 

If you are lacking, take some multivitamins daily to boost your system and make you feel more human. 

Foods that help your hair grow can be; Nuts, Olives, Eggs, Salmon, Seeds, Sweet Potatoes & Avocado. 


Tip 10: Don't Dry Your Hair With a Towel. 

leluroxx.blogspot.co.uk

I have learnt never to towel dry your hair, it's just as bad as back combing it when it's wet. 

It rubs the hair up the wrong way, encourages knots and contributes to breakage. This happens because the hair gets caught in the woven fibres. Try using a silky fabric instead (as told by a fellow blogger, great tip) or even better let it dry naturally. 


These tips are fool proof, easy to conduct and fail safe. My hair is in a lot better condition now and it's growing. Remember there is no miracle cure but these tips will ensure that your hair will grow healthier, less prone to breaking and as a result you will see positive movements. 

Love 


X  

SHARE:

Monday 8 September 2014

Colour B4 Hair Stripper // Is It Worth It? My Review.

leluroxx.blogspot.co.uk


I love to change my appearance, especially where my hair is concerned. I have coloured my hair for years now, never myself though as I have mainly worked in hairdressers, so I have always had it done there.

Almost two years ago I was bleached, white blonde and I have always wanted to go this colour. After having a lot of my hair cut off to go that colour I soon managed to have the shade I desired and began to grow my hair again. 

leluroxx.blogspot.co.uk
 This is what it looked like not long before I dyed it brown.

I have always had like little nightmares about going dark but one morning I just decided to do it. Now that I have been dark for almost 2 years I have decided I want a bit of a change. I want to go lighter but not as white as I went before.

Obviously I have bleach under the colour I have now as that will always stay there until it eventually grows out or I have it cut out. Having it cut out is NOT an option for me.

No way!!!


leluroxx.blogspot.co.uk


To get my hair remotely lighter I would need to strip the colour I have on it currently, which you can see in the above picture. I have had bleach baths done before at the hairdressers and it does damage your hair and I didn't want to stress my hair out again and risk it snapping off. 

I was told about the at home stripper called 'Colour B4' which was originally created by Scott Cornwall, but he has since done another similar product and this one has been taken over by Katie Price, as the Ambassador. 

The product claims to strip your hair without the use of bleach or ammonia which would damage your hair but instead shrink the hair colourant particles and they get washed out by using Colour B4, leaving your hair in its natural state. 

I hesitated buying this product because I was unsure about it but because it claims to not damage your hair but take it back to the colour underneath, I thought "what do I have to lose?"

Big mistake. 

I will now tell you why.

leluroxx.blogspot.co.uk

I bought the Colour B4 in'extra strength' because that was what was needed for my hair colour and got the argon oil version as I thought it would put some nourishment back into my hair.

These are £11.99 a pop and I ended up using 3 boxes, two boxes on my first application to make sure I saturated my hair fully as it is long, and one on my second application just to get the remaining dark patches. 

I had watched YouTube video's on how this applied but I went through all the instructions that came with it with a fine tooth comb to make sure I did everything right.

Before I even touched my hair with this product I did a strand test to see what colour my hair would go. 

This was the result. 

leluroxx.blogspot.co.uk
After the processing time.

leluroxx.blogspot.co.uk
Once dried. 


This is the contents of the box.

leluroxx.blogspot.co.uk

It came with gloves, instructions and bottles A, B and C. You then pour (A) the activator into bottle (B)the remover and shake for 30 seconds, I timed EVERYTHING to make sure it was all done properly. Part (C) is the buffer which you use in the rinsing stage at the end. Once (A) & (B) are mixed together you are good to go. 


 leluroxx.blogspot.co.uk

I sectioned my hair because I had a lot of it and need to make sure every strand of hair had the remover on it. 

And let me tell you now, this stuff stinks. At first it smells like perm lotion which I was fine with but after a while it smelt of eggs and when it was drying to me it smelt like a 3 day old kebab. It actually made me feel sick. 

Anyway, I coated all my hair in the remover and used two boxes. It was safe to say my hair was fully saturated in the stuff. I also combed it through too to make sure it was evenly distributed. I then proceeded to wrap my head in cling film so it would trap my head heat. You need to keep the product on your hair warm so it processes. I put a towel and two hats on too to make double sure it would all go smoothly. I kept mine on for 60 minutes. 

Once the time was up I was a bit apprehensive to take the cling film off because I had no idea on what was underneath and if I still had hair on my head. I say this because a lot of my hair was coming out when I was combing the product through in the beginning. 

I looked in the mirror and my hair was a bright copper colour all over. I was shocked it actually worked. It took the whole lot of my colour off, or so I thought!

The next step was the gruelling task of the wash off. I then had to rinse my hair for 10 minutes non stop to ensure the product had come off my hair. I then had to use the buffer (bottle C) and lather up and leave on for 1 minute, again all this was timed. I then had to rinse again for another 10 minutes and once that was done I then had to use bottle (C) again and do a normal shampoo. It didn't say to use conditioner after so I didn't. As I was washing it off I did notice my hair was progressively getting darker...Not like the copper colour it first came out like.

This is what it looked like once dried.

leluroxx.blogspot.co.uk
The strand test against my colour before it was stripped.

leluroxx.blogspot.co.uk

leluroxx.blogspot.co.uk


As you can see after the first application it had lightened my root area and only slightly on my mid-length and ends. It looked like I had a reverse dip-dye colour and definitely not the outcome it looked like I was going to have when I took the cling film off.

Far from the all over copper colour it was perceived I was going to have. 

I thought about it and decided that I must have had quite a bit of colour build up on the mid-length and ends so decided to get another box and re-do those parts and not touch the ends. You can re- apply up to three times in one go, or so it claims.

So a couple of days later I re-did it. This time it had lightened some more but the ends were a little darker still than the rest and it was really patchy and there were some dark parts in my root area which I couldn't explain as they weren't there before. And, I hadn't applied any colour there. I left my roots out of the second application.

When I had seen everyone's "supposed" outcomes from the product their hair is all one colour and even. Mine wasn't at all and a far cry from anything similar. I wasn't impressed but thought I'd live with it until I had it highlighted. It came out quite red/auburn and I kind of liked it. 

leluroxx.blogspot.co.uk


leluroxx.blogspot.co.uk

leluroxx.blogspot.co.uk

leluroxx.blogspot.co.uk

leluroxx.blogspot.co.uk

leluroxx.blogspot.co.uk

As you can see it went a really nice colour and I actually really liked it. It looked more even at night time but obviously in the day light you could tell it was slightly two tone. I could of lived with it though.

Now this is where it started to go wrong.

I decided to wash my hair 3 days later because it felt REALLY dry and disgusting. I wanted to wash it to make it feel like I had hair on my head and not an egg. Now this product had done some sort of damage because my hair felt so dry and a lot had snapped off.

After I had finished washing and my hair I noticed it seemed to be quite darker even when wet. I ignored it and thought it would be back to how it was before I had washed it when it was dry.

Nope. 

After I had dried it this is how my colour looked.

leluroxx.blogspot.co.uk

leluroxx.blogspot.co.uk

I mean "WHAT THE ACTUAL HELL"? 

All I did was wash my hair, there was NO reason for it to go darker. I just don't understand. I followed the instructions EXACTLY, after the second application it lightened and you can see from the pictures that it had. I washed everything out and now it's significantly darker.

Why? That is what I want to know. I have not applied any colour and it can't re-oxidise from just a simple wash 3 days later. I am actually flabbergasted with the results and to be honest disgusted with the product as a whole. I have shown hairdressers' these pictures and none of them have ever seen this happen with a product before and most of them have never heard or even used Colour B4 so couldn't advise me on why this has happened. 

I have emailed the company a complaint but as of yet I have heard nothing back off them. 

I will be completely honest with you now, this product is complete crap and I wouldn't recommend it to anyone. I am aware I had a lot of colour build up and I wouldn't get all the dark colour out due to cuticle staining. But after the second application it came out a 'decent' colour even though it was patchy, I cannot for the love of God understand why on earth it would almost go back to my original dark colour just through washing my hair. I would of had to have coloured it to get it that dark again as the colour was stripped out.

I am completely baffled.

It's left my hair in horrible condition, it's thinned out a lot and now I am left with what looks like massive roots that I am going to have to have corrected professionally. 

Not cool... Not cool at all.

I am actually quite annoyed about the whole thing and the fact I have wasted quite a bit of money. That is the whole reason I did a strand test, and I cut the hair where there was most colour build up and you can see from the picture's that it had lifted really well. 

On their website it shows 'before and after' pictures and a lot of the people have obviously had their hair re-coloured and bleached which is not actually showing the true results a lot of the time. It's deceptive and by all means if you still want to try this product that it totally up to you, but I highly wouldn't recommend it at all. It's an awful product and not worth the risk. 

If anyone reading this could explain to me why my colour darkened after washing I would love to know, or if you yourself have had a similar experience I would love to hear from you. 

I hope this has helped you overall in regards of what to expect from this product and the procedure you have to endure. 

SHARE:
© LoneWolfLeya. All rights reserved.
Blogger templates by pipdig