Monday, 4 January 2021

Hair Hack | How To Get Stubborn Blue/Purple Toner/Shampoo Out Of Bleached Hair Without Damaging it | Life Saver.


lonewolfleya.blogspot.com


Yo! Welcome to 2021... Level 100 of the Jumanji game. Lol. 


I am writing this just as we are potentially going into ANOTHER freakin' lockdown. Our pal Bozza sure likes to play risky little games now doesn't he. Yawwwwwnnn. 


I hope everyone had a lovely Christmas and New Year's even though it was eerily different this year, it just wasn't the same. I miss going out to bars, dancing and having meals out. I miss having family and friends over. This new 'norm' sucks serious a hole!!!


So just before Christmas I decided I was hella bored with my hair, it was really long but the ends were so wispy and dead and the blonde colour I had was outgrown and just plain boring for me. 


I was debating for ages whether to go blonder or dark, I was bored of the blonde and I decided to go dark. THEN... On the night before actually getting it done I decided to change up the whole colour scheme all together!!! 


I chose to go down the path of the 'Narcissa Malfoy' trend. Now, if you haven't watched Hazza Pothead (Harry Potter) then we cannot be friends... Ha. This is where the hair trend came from, Draco Malfoy's mother. In short, it's dark hair on top and bleached hair underneath. 


I am an alternative gal and I couldn't just do standard brown hair, I would be doing myself a serious injustice. Ha. 

So, I had that done, I loved it, it turned out perfectly, no colour bleeding, I had around 3 inches off the length (not to be dramatic but I felt like I had been scalped) and I was super happy. 


Fast forward to my hack and life saver. 


So, if any of you are blonde, you will know, bleached hair needs toning. To get the desired tone and get rid of he brassiness, your hair will 100% need this. 

I at home, washed my hair for the first time since having it done and mixed a toner with 1.9% developer. I used a toner recommended to me but it turns out it shouldn't be used as at toner but as a colour... Whether that is correct or not I am not sure. Either way my soul was about to leave my body. 


I mixed the toner up, applied it to the blonde and within minutes my hair has turned ultraviolet on the roots and grey/green mid-lengths and ends. I was almost sick in my mouth. I knew toners developed quickly but that was having a pure bubble bath. It looked horrid. It would of looked fine if I had an all over bleach but with the warm brown against the cool blonde, I hated it.


lonewolfleya.blogspot.com
It was sooo grey/purple/blue when dry... I put more toner 
on at this point to try and even it out, *covers eyes*.


I washed it with Head and Shoulders (not the brown) and Fairy Liquid... Wouldn't budge. I washed my hair a total of around 3/4 times that day... Any more and it would start to damage my hair. 


lonewolfleya.blogspot.com
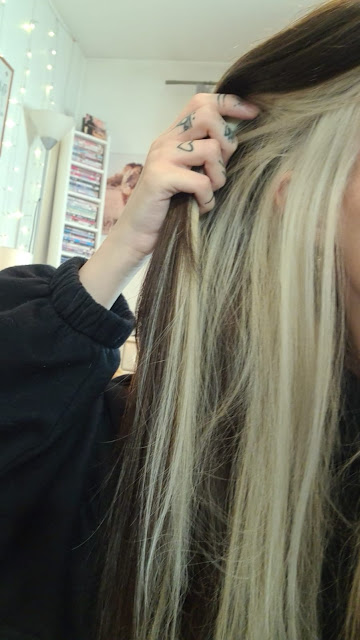
Look at the grey/purple tones. 


I was freaking out that I couldn't go out in public, nobody was answering their phone to help. So, I took it upon myself to try one off the cuff thing that I had left as an option...


LEMON AND CONDITIONER!!! 


Yes, you read correctly. Lemon has natural bleaching properties and can lighten hair. Mixed with conditioner, it shouldn't damage the hair. 


So I cut 2 whole lemons squeezed all the juice into a bowl, then mixed with conditioner. I did 1:1 ratio (50% lemon juice and 50% conditioner). 


I applied to all of the blonde hair and left it on for 1hr and 30 mins. 


Now, I didn't do a patch test, I didn't have time, I read afterwards, you're meant to. 

At the time I didn't even think to do one because it's just lemon juice right?

 Well, turns out my skin did not like this concoction and I did actually react. Not on the scalp but on the skin around the back of my neck, ears and hairline. I am really sensitive anyway but I never have problems with scalp bleach, I mean,  I suppose I am sticking acid on my skin. Go figure. Not everyone has this happen though FYI. 


I washed it off my hair and goodbye blue/grey. It was gone. I was left with the blonde I kind of had to start off with. I was so happy. My hair wasn't damaged, no split ends, no candy floss. It was like it never happened. 


lonewolfleya.blogspot.com


I hope if this ever happens to you and you come across this post, that it helps you and works for you too. It was literally a lifesaver for me and my hair. 


Let me know in the comments if you have used this method and how it turned out for you!!! 


Love and Light 

Your resident Lone Wolf


L x

SHARE:

Thursday, 18 August 2016

What I Use To Take My Blog And Instagram Photos Plus Equipment, Editing, Hints And Tips.


bbloggers, beauty, makeup, beauty blogger, black and white, photography, canon 600d, instagram, blog, lighting equipment, ring light, neewer, editing


Hello my lovelies! 

It's so freaking hot today and I have been a busy little bee let me tell you. Only around the house that is. 

I put on fresh, new bed sheets today and I am so proud of myself because usually I cannot for the life of me get the duvet into the corners of the sheet. It all bunches up and looks a complete and utter state. 

I have had a rocky week emotions wise but today I feel productive and positive. I accidentally on purpose made another Beauty Bay order today because I missed out on the Morphe 350 palette yesterday as they never pre-announced that it was going onto the site. They did however announce that they were going to put up the 350M palette. I was all over that shit man, I love my matte shadows. So I was up bright and early to get that little bad boy along with some other bits. 

Thank goodness for birthday money. Ha. 

So that should arrive tomorrow. I will do another little haul for you. Oh... And Beauty Bay contacted me today and asked me to be part of their affiliate programme which I 100% agreed to. I have had a few brands contact me too, to review their products. 

Keep an eye out for those :) 


Okay, down to business. I have been asked A LOT on what camera I use to take my photos and have been getting so many compliments on my photographs,especially my makeup ones. 

So, the nice person that I am, of course I was going to spill my secrets!!!

N/B I am also fully aware that my annoying blog stalker will no doubt see this and copy. SO if you're reading this... "HI".  

Along with telling you guys what camera I use, I thought I would also address things like the lenses, equipment, lighting, editing and my hints/tips. 

It may come in useful, it may not. You can take whatever information away with you and adapt it to suit your needs. 

Lets GO!


Camera - Model and Make


When it comes to taking my blog photos I actually alternate between my phone and my DSLR. The only time I will use my phone is if I am taking photos like the ones below. Other than that I will always use my DSLR.

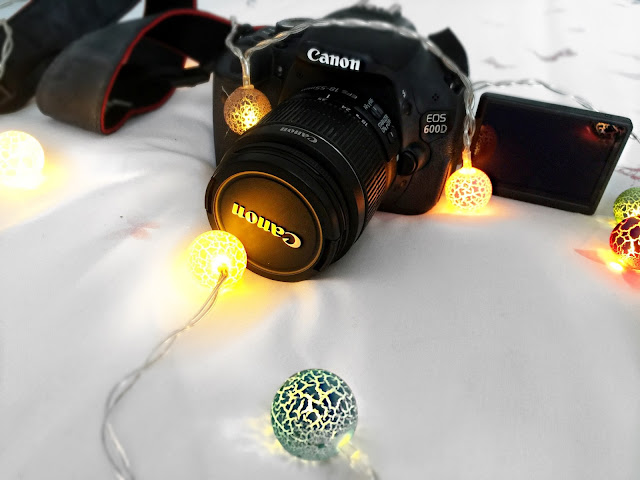
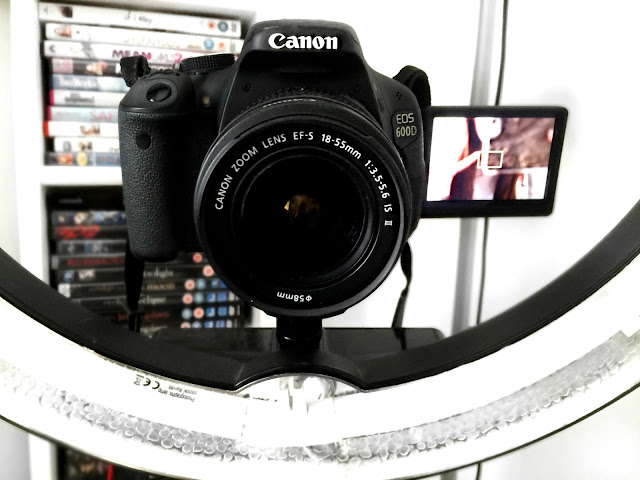
The brand and model in which I invested in is the Canon 600D. They are actually discontinued now but I wanted this one as it has a flip out screen which makes it hella a lot easier when taking photes. I had to do my research to track this down and it is retailed at around £400. 

At some point I will upgrade but I wanted this one to practice, learn and improve my skills on. 

It is really user friendly and takes some awesome pictures. With these camera's though practise does make perfect as you have to switch between ISO's, F. modes and apertures. It really frustrates me when the camera takes a blurry picture because the lighting isn't right and it doesn't focus properly. 


TIP: When swapping lenses make sure you keep the body of your camera facing down to avoid any dust falling onto the mirrored part inside. You get any particles on that and your camera is on the brink of extinction. 


bbloggers, beauty, makeup, beauty blogger, black and white, photography, canon 600d, instagram, blog, lighting equipment, ring light, neewer, editing, how to, blogging advice, what i use, professional photographer, makeup looks, close up makeup,


Lenses

When it comes to lenses, there are many that I want but man you have to take out a mortgage to afford one. They are so freaking expensive. I really want a 'Pancake' lens and a macro.

When taking my closeup images I will stick to the original lens that comes with the camera and tend to manual focus so I can get up close and personal to whatever I am wanting to focus on. 

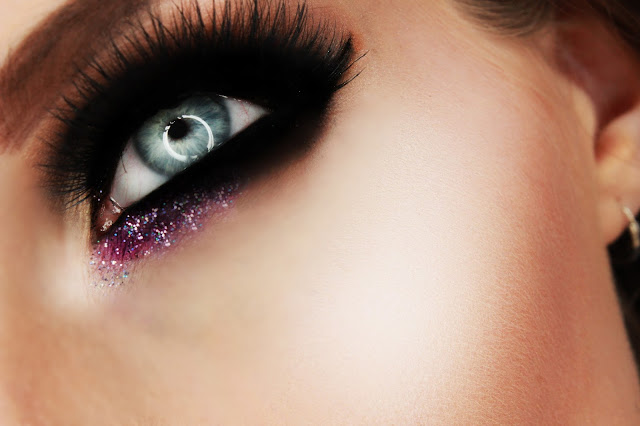
This is what I do when I want to get a good shot of my eye makeup. I find that if you're on auto focus you don't get the same detailing. 

 TIP: If you want a good close up manually do it. I learnt this on the way. Oh and what took me forever to realise is that I couldn't actually find how to manual focus, I was sliding the zoom in and out on the lens and then it suddenly clicked when I was messaging about. The actual manual focus is on the very end of the lens, on the rim!! 

There's another tip, check that out if you have been doing the same as I was. 

I have two other separate lenses too - I have a telephoto zoom lens which I use more outside to focus on subjects in the distance. It's a Sigma lens and it's super good. 

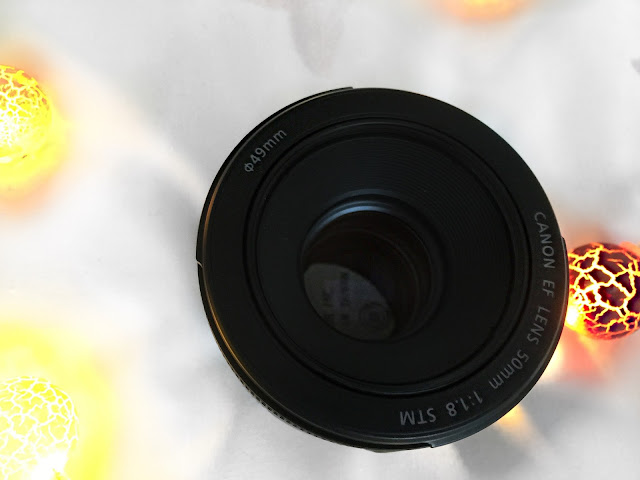
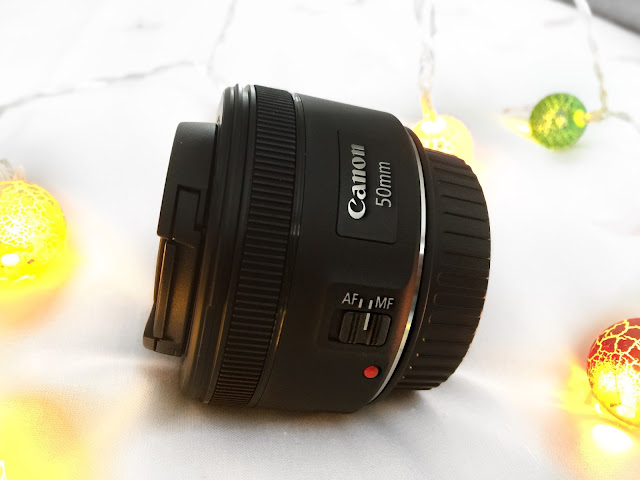
The lens below is a 50mm f/1.8 STM. This lens I will use mainly for when I am filming a video on my DSLR, it's great at blurring out the background and focusing on the subject in the foreground. 

This lens doesn't have a zoom so you have to be a certain distance away from the lens. 

Tip: This lens is ideal for videos, occasion's such as weddings and taking portraits.  

bbloggers, beauty, makeup, beauty blogger, black and white, photography, canon 600d, instagram, blog, lighting equipment, ring light, neewer, editing, how to, blogging advice, what i use, professional photographer, makeup looks, close up makeup,
bbloggers, beauty, makeup, beauty blogger, black and white, photography, canon 600d, instagram, blog, lighting equipment, ring light, neewer, editing, how to, blogging advice, what i use, professional photographer, makeup looks, close up makeup, violet voss, holy grail palette,


Lighting


bbloggers, beauty, makeup, beauty blogger, black and white, photography, canon 600d, instagram, blog, lighting equipment, ring light, neewer, editing, how to, blogging advice, what i use, professional photographer, makeup looks, close up makeup,


Lighting is SO important to the turnout of your image, you don't take a picture in the correct lighting you risk losing, quality, atmosphere, detail and more importantly interest from your viewer. 

If you can get some good natural light use that, there's nothing better than awesome natural light to take your blog/Instagram pictures - however with the typical British weather that's not always possible. 

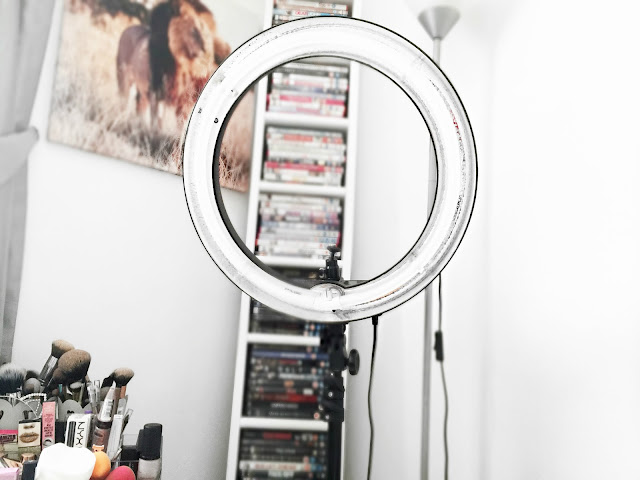
I originally bought a ring light that you attach to the front of your camera lens. I liked that and it's good to take around with you as it's portable and bag friendly but I wanted the king of lights. 

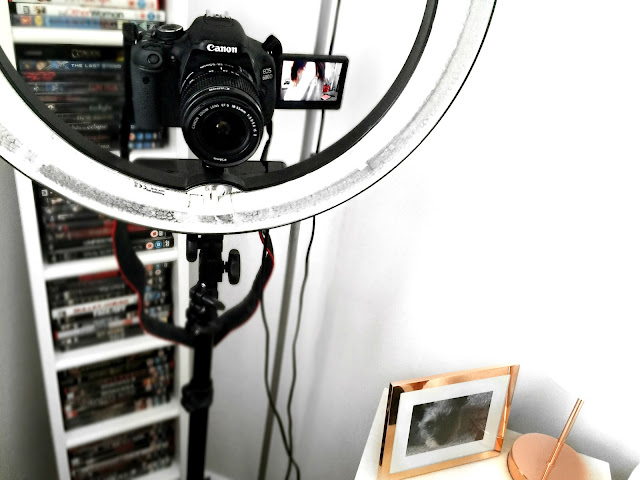
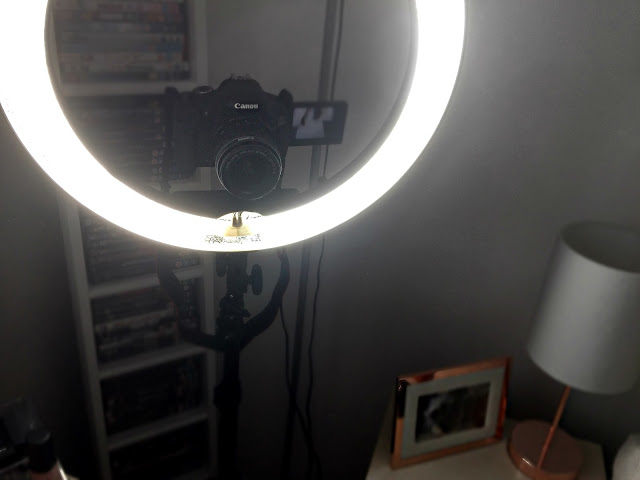
A ring light. No joke, having a ring light has been a god send to me, it's really upped my image game because I am able to highlight all the areas I need to successfully take my picture. They aren't majorly cheap but if you are invested into your blog/Instagram/photography this is a must, especially if you take  lot of makeup images. 

The one I have bought was from Amazon (Neewer) and was around £100 and it's dimable, comes with a stand, hot shoe attachment and filters. I don't think think it's bad pricing at all. 

TIP: The plug is a universal one so comes attached with a 2 prong connector, make sure if you get this that you get a plug piece to connect the prongs to it. 


bbloggers, beauty, makeup, beauty blogger, black and white, photography, canon 600d, instagram, blog, lighting equipment, ring light, neewer, editing, how to, blogging advice, what i use, professional photographer, makeup looks, close up makeup,


Backdrop


I never had a backdrop up until recently but it's always nice to have a pretty background in your pictures. Whether you're doing a flatlay or a face/body shot take pride in what appears in your background. 

There's no point in placing a product onto a uninteresting background, especially if you're posting on Instagram because it's all so visual on there you need to make it eye-catching. 

Invest in props, fairy lights, flowers, wallpaper samples... You name it, grab it. 

Thank me later. 

As for my backdrop, I need to hang mine from the ceiling as I photograph from an awkward place in my room. Choose a backdrop that's going to make your image stand out, something glittery is always a favourite with us bloggers, or even just a plain white one is super cute too. 

I opted for a kind of holographic background and have been hanging it from my wardrobe. Ha. 

Means must and all that.

TIP: You don't have to go all out to create a decent backdrop, so you can keep it relatively inexpensive. I went to The Range (UK) and purchased 1.5m of the below lino fabric and it cost me £5 and I purchased a plumbing pole to hang the fabric on and hook to the ceiling for around £2. Sorted. 


bbloggers, beauty, makeup, beauty blogger, black and white, photography, canon 600d, instagram, blog, lighting equipment, ring light, neewer, editing, how to, blogging advice, what i use, professional photographer, makeup looks, close up makeup, beauty bay, holy grail palette, violet voss,


See, it makes the image look so much more polished! This I placed on my Instagram. 


Editing My Photos


I don't know about you guys but I LOVE editing my pictures, it gives me a sense of gratification and achievement. Okay, sure, it takes an absolute stone age, whether you're editing photos or videos but it's totally worth it when they turn out amazing. 

I tend to switch between my phone app and an app on the internet. 

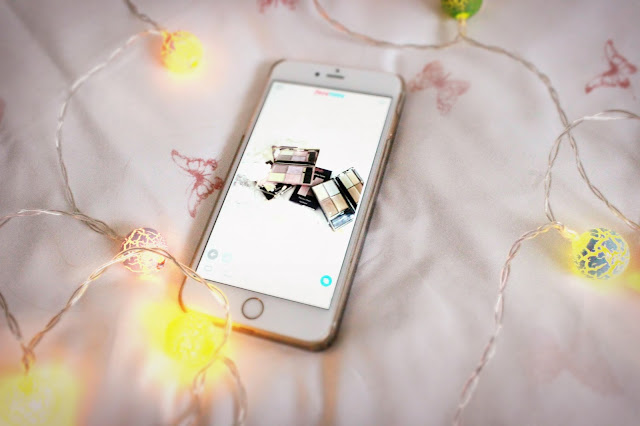
On my phone, I will edit my pictures on 'FaceTune'. I will whiten the backgrounds with the whitening tool and add filters. I also like to use Afterlight too sometimes to add lighting effects. 

All these things make such a difference to the final appearance of your pictures. 

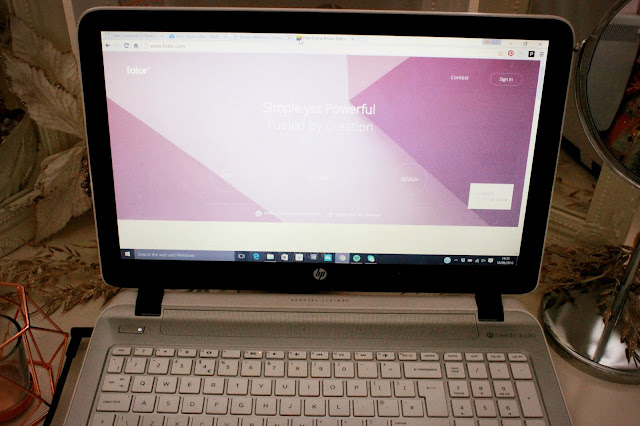
On my computer I will use the app called 'Fotor' - you do have to pay for this monthly and I use this to edit the contrast/brightness and add filters and effects. 

This is a fun process. If I am editing a video I will use Final Cut Pro on my brothers Mac as I am yet to get one. 


TIP: Keep your edits original, you don't always have to stick with a theme like Instagram suggests. Edit to reflect your personality. I like to keep my images a little quirky in how I edit and present them. There are lots of FREE good apps out there. 

bbloggers, beauty, makeup, beauty blogger, black and white, photography, canon 600d, instagram, blog, lighting equipment, ring light, neewer, editing, how to, blogging advice, what i use, professional photographer, makeup looks, close up makeup,


Thank you everyone for taking the time to read my posts and for following my blog. I have had a lot more hits these last couple of months and I fully appreciate it. 

It means a lot :) 

I hope you found this post useful and if you're a beginner to photography and the world of blogging, I would like to think this could help you. 

I don't have soft box lighting and all the fancy equipment and you don't need to either. I have spent some money, yes, but if you really are serious about what you're doing it's worth the spend.

If you would like to follow my blog you can here on Bloglovin'. 


You can also find me on the following social media sites. 


Twitter: Leluroxxblogger

Instagram: Leluroxxblogger

Facebook: Leya.Hutton

YouTube: Leluroxxblogger

Snapchat: Blackeyedfox


Until next time...


leluroxx.blogspot.co.uk


SHARE:

Monday, 15 August 2016

Top Drugstore Products To Create A Flawless Base That Is Instagram Worthy | Slay That Makeup Look.

drugstore, budget, drugstore brands, makeup look, flawless base, foundation, perfect makeup, sleek makeup, loreal infalliable, collection


Evening guys and gals around the world. 

You well? 

I am totally full of hayfever right now, it's not even funny. It is actually causing me pain! 

I stupidly went on a cleaning spree today which in turn made dust fly everywhere and I haven't stopped sneezing. 

For a while now, I have had A LOT of people compliment me on my makeup looks, every day makeup and how flawless the overall finish is. 

With those compliments (which I am so freaking grateful for as it makes the effort I put in worthwhile) I will get asked "what do you use on your eyes- how do you get it so blended?" and "your base looks flawless, what do you use?"

So I thought I would address the whole flawless base thing for y'all today. 

I have brought together a bunch of my most used/reached for affordable drugstore products that I use to create my base whenever you see me with makeup on. 

I was going to add brushes into this but I might leave that for a separate post. I will however show you the brush that I currently reach for to apply my foundation and I feel that brush makes a massive difference. 


So, read on and I will tell you step by step what I use and it really does work. 


Lets GO!! 


drugstore, budget, drugstore brands, makeup look, flawless base, foundation, perfect makeup, sleek makeup, loreal infalliable, collection, simple skincare, skincare, moisturiser,


First off I will apply my daily moisturiser, you can use any that works for you but for me this is a major favourite. Sensitive skin users this would be GREAT for you. I apply this to ensure my skin is nice and supple before applying the primer. 

I will apply all over the face and neck and allow to dry for a couple of minutes.


drugstore, budget, drugstore brands, makeup look, flawless base, foundation, perfect makeup, sleek makeup, loreal infalliable, collection, nivea post shave balm, primer


After the face cream has dried I will then go in with a primer. Right now I am loving the Nivea Men Post Shave Balm, it really sticks to the skin without feeling heavy and this primes the skin perfectly for your base to stick onto to.

I have found my makeup has stayed in place A LOT longer with this underneath. 

drugstore, budget, drugstore brands, makeup look, flawless base, foundation, perfect makeup, sleek makeup, loreal infalliable, collection, illuminator, highligher
drugstore, budget, drugstore brands, makeup look, flawless base, foundation, perfect makeup, sleek makeup, loreal infalliable, collection, illuminator, highlighter


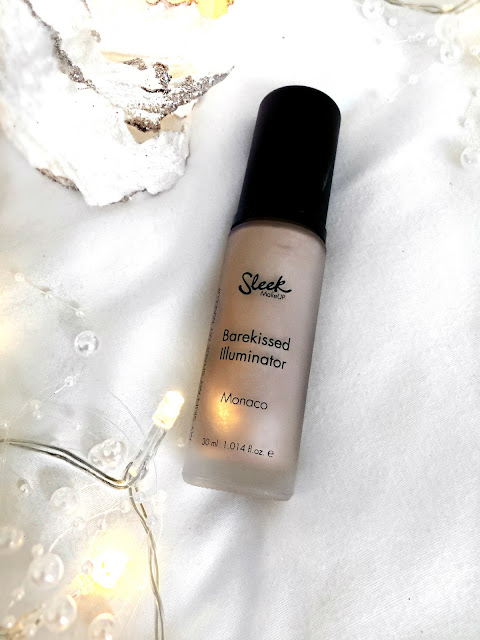
Like every other girl out there right now, I am loving that glow though. Ha. I am also loving Sleek Cosmetics products too and I am slowly getting through their collection. 

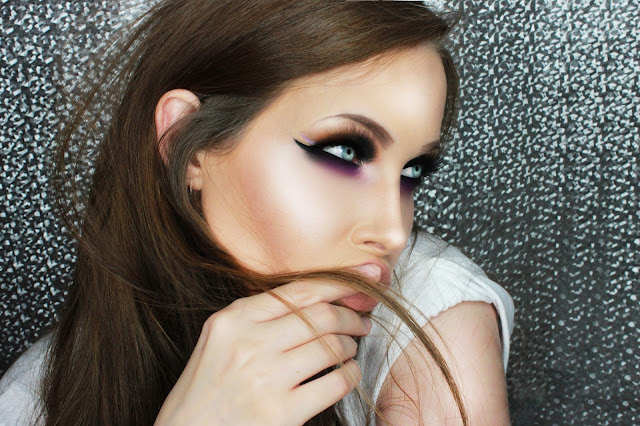
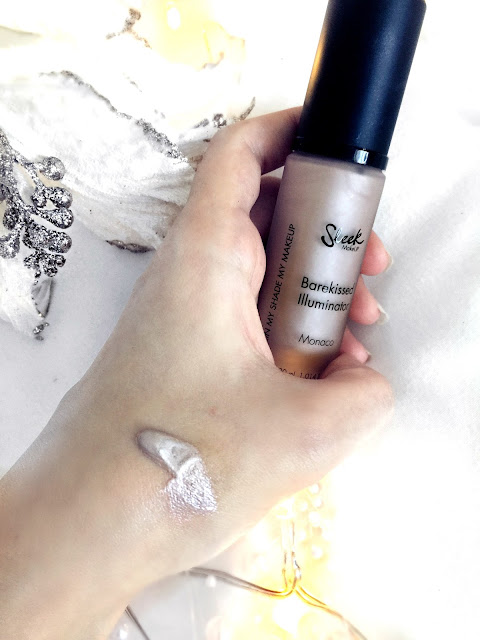
This little beauty is their 'Barekissed Illuminator' in 'Monaco' and it's a lovely lavender/silver toned liquid highlight that is super pigmented to give your skin that dewy glow that is just addictive. This sits nicely on top of the primer ready for your foundation, where it shines through from underneath.


drugstore, budget, drugstore brands, makeup look, flawless base, foundation, perfect makeup, sleek makeup, loreal infalliable, collection, maybelline 24 hour,


The next step after the good old liquid glow, is to cover my dark circles and spots with my trusty Collection concealer. The main step now is my foundation. 

Currently I will go between my favourite Maybelline 'Super Stay 24hr' foundation and the new L'Oreal 'Infallible 24hr' both are matte and high coverage. I use shade 'Ivory' as this is more matched to my skin tone, plus it allows me to build up more of a natural bronze and contour. 

These products are pinnacle to my flawless coverage and overall appearance. If I am doing a dramatic eye look I will usually apply the eye makeup first to avoid fallout. The amount of times I have done it the other way round and the fallout has created weird grey patches on my cheeks due to it sinking into my base. Annoying much. 

I will buff the foundation in with my Nanshy 'Buffed Base' brush which is totally amazing guys. Seriously, it's dense which blends the foundation and not move it about. This gives me my airbrushed finish. 

drugstore, budget, drugstore brands, makeup look, flawless base, foundation, perfect makeup, sleek makeup, loreal infalliable, collection, nanshy, makeup brushes,


I have a discount code especially for you guys for 10% off your order. Use - leluroxx10

You're welcome. :) 

Skincare is another must to achieving a perfect base you can find my tips and the products I swear by here to get rid of spots and blemishes.


drugstore, budget, drugstore brands, makeup look, flawless base, foundation, perfect makeup, sleek makeup, loreal infalliable, collection, rimmel, matte powder, setting powder,


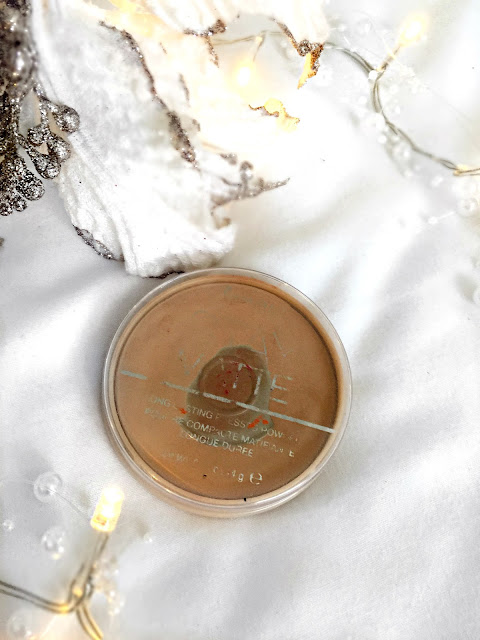
To set my foundation I always use the Rimmel matte powder in 'Sandstorm' to make my finish extra matte and polished. It really sets the base in place but doesn't make it look cakey and it is really lightweight so it makes your foundation that way too. 

It takes away any shine and again maintains the airbrushed look.

drugstore, budget, drugstore brands, makeup look, flawless base, foundation, perfect makeup, sleek makeup, loreal infalliable, collection, concealer, high coverage


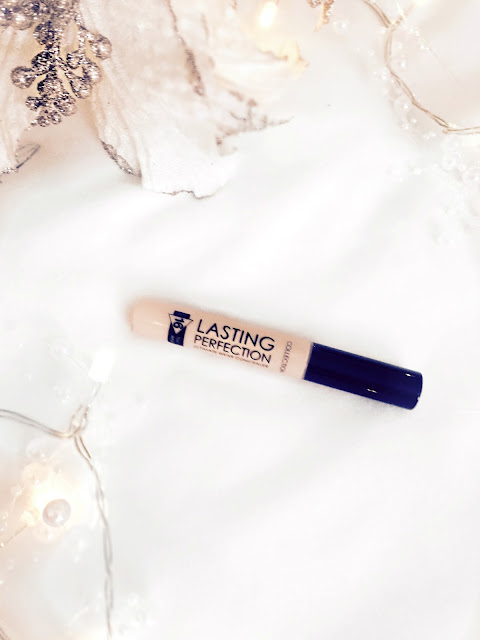
Under my eyes and around the top of my cheekbones (on top of the foundation) I will apply my Collection 'Lasting Perfection' concealer in 'fair'. 

This is the best concealer ever... It's got major coverage and I use this on top of my foundation as a highlight - to lighten the eye and cheek area. To blend this out to make it seamless I will use my Lab beauty blender and my Real Techniques beauty blender and dab it around those areas. 

This is my favourite step and it really finishes the base off perfectly. It adds light to the areas that are covered with shade if you get me. For me this is a must have step!

I will also do the same step on my chin, bridge of my nose and forehead. Hitting those places the light will naturally hit.


drugstore, budget, drugstore brands, makeup look, flawless base, foundation, perfect makeup, sleek makeup, loreal infalliable, collection, la girl, high definition powder,


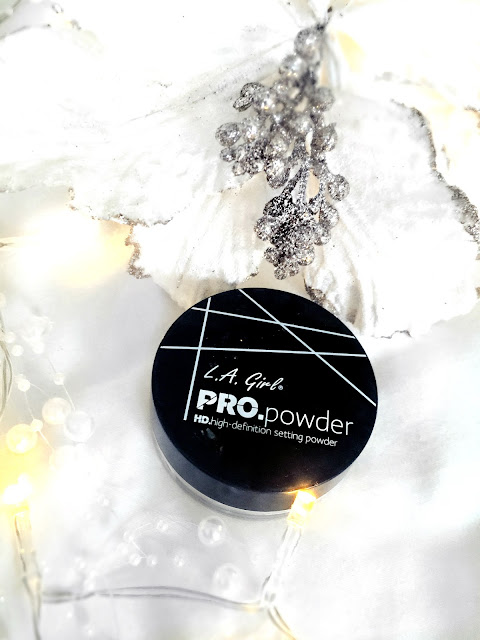
Okay so this isn't technically 'drugstore' but it's £4.99 and as an alternative I do use baby powder as it does the same thing. This packaging was nicer to photo. Ha. I use the setting powder (translucent) to set the concealer and stop it from creasing. 

drugstore, budget, drugstore brands, makeup look, flawless base, foundation, perfect makeup, sleek makeup, loreal infalliable, collection, primer, eyeshadow, mac cosmetics, pro longwear, soft ochre,


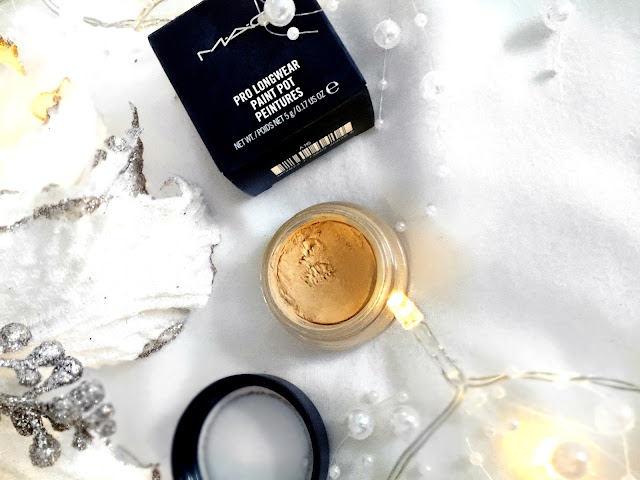
As a base for my eyeshadow I will apply Mac's Pro Longwear paint pot in 'Soft Ochre'. This is yellow toned and super perfect for cancelling out dark tones and veins in the  eye area. I will then swirl onto it a skin toned shadow to set the base. This will make it a lot easier to blend your shadow out. 


drugstore, budget, drugstore brands, makeup look, flawless base, foundation, perfect makeup, sleek makeup, loreal infalliable, collection, contour, cream contour,


Contour is a must when sculpting your face and perfecting your final look. I will use a powdered bronzer product first in the hollows of my cheeks, up to my temple and blend it out. I will then use a cream contour to define and conquer. Ha. 

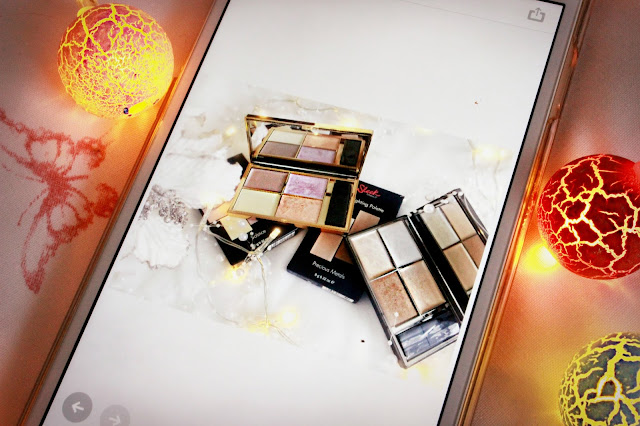
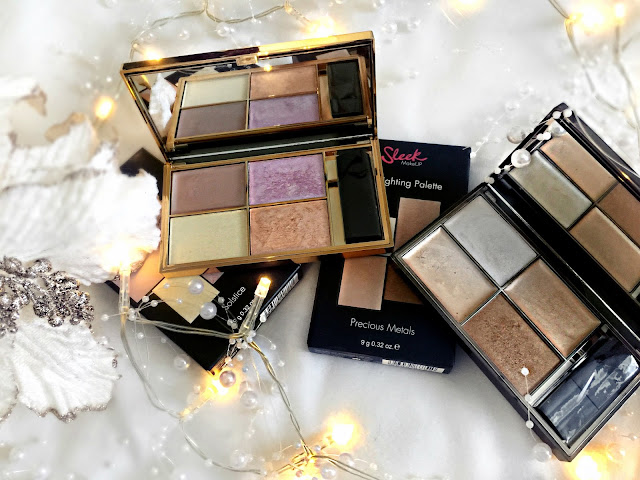
drugstore, budget, drugstore brands, makeup look, flawless base, foundation, perfect makeup, sleek makeup, loreal infalliable, collection, precious metals, solstice, highligter, highlight palette,


I promise this isn't sponsored by Sleek, ha. I just love their products and the brand. 

As my final step and the finishing touch to my flawless base is to add highlighter. I do use The Balm usually but since buying these beautiful bad boys I have fallen in love and want to smother my face in it. 

I will highlight above my cheek contour and slightly under the eye to brighten it more. I will also add the glow to the nose, chin and forehead. Sometimes I also add it to my collar bone as mine are quite prominent to add extra depth. 

:) 

If anyone would like a YouTube tutorial on this or anything else let me know in the comments because I am still trying to build my confidence. Ha. That way I will know what you want to see. 

drugstore, budget, drugstore brands, makeup look, flawless base, foundation, perfect makeup, sleek makeup, loreal infalliable, collection, highligher, glow, contour,
  

I hope you enjoyed reading this post. I always try to write posts that you would be interested in so any suggestions are welcome. 

:) 


If you like reading my posts you can always follow me here on Bloglovin'. I would SO love it!! 

Also, check out my recent posts at the bottom of this post as there is something for everyone out there.


You can also find me on the following social media accounts. 


Twitter: Leluroxxblogger

Instagram: Leluroxxblogger

Facebook: Leya.Hutton

Snapchat: Blackeyedfox

YouTube: Leluroxxblogger


Until next time... 


SHARE:

Monday, 25 July 2016

How I Get Rid Of My Spots And Blemishes | Using Superdug's Skin Care Range For Sensitive Skin

highlight, skincare, superdrug, thebalm, spots, clear skin, drugstore,


Good evening ladies and gents. 

It's everyone's favourite day of the week again. Monday Funday y'all. 

I have had another stressful weekend as Cody (my Guinea pig) is still poorly and I have spent all my time trying to get him to eat. I had to take him back to the vets yesterday because my gut is telling me that there is something else going on. So I have told them I want him completely scanned and X-Ray'd to find out the cause of what's going on. 

I pick him up tomorrow evening. I miss my fur baby. 


The last few months my skin has been going cray cray and I kept getting real bad spots along my t-zone. Mainly on my chin and they aren't little small dweeby spots. Oh no... They are the massive kind of beasts that don't actually erupt from under the skin but sit under it and hurt like a bitch!!!

And as soon as I got one to go away it would come back up with its little mates at its side. They have actually scarred my skin now. I am working on getting rid of those. 

I have been switching up my skin care routine until I found one that actually worked for me and one of which that would actually sort my awfully annoying skin out. 

I have sensitive skin and when I am hormonal, stressed or anything freaking else I tend to break out. I NEVER used to get spots at all. That's soon caught up with me like a bad smell. 

I wanted to find products that were natural, specifically for sensitive skin and not full of the fake crap that every brand seems to have right now. 

I am on a budget, so I took to Superdrug to find something that I feel would be suitable for me and my lord, I have ACTUALLY found products that work and have kept my skin clear since I have been using them. 

"Can I get an amen?!"

Yep, ladies and gents if you have sensitive and problem skin you NEED to use these products. 

This isn't a sponsored post, it just turns out that Superdrug's own brand is freaking super good! 


highlight, skincare, superdrug, thebalm, spots, clear skin, drugstore,


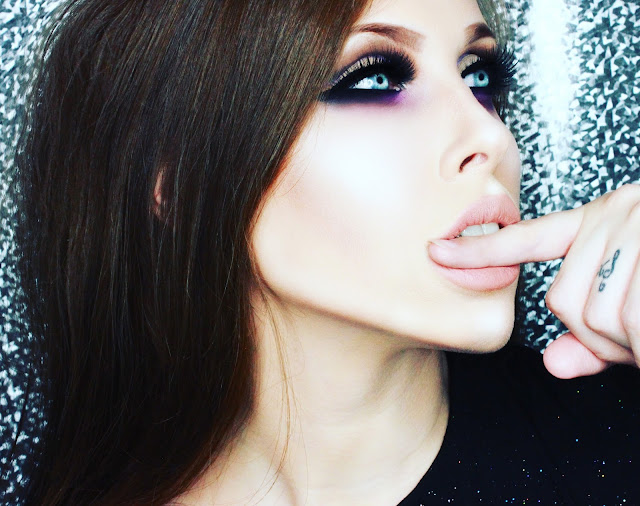
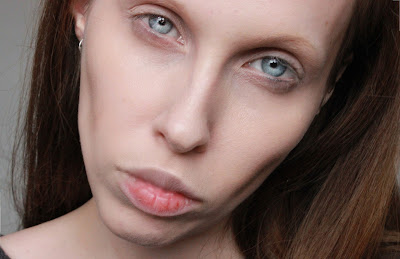
Wow, I look like an actual vampire in the above! 

Ha ha. 


simply pure, skincare, superdrug, clearly youthful, spots, clear skin, drugstore,
spot clearing, blemish, superdrug, drugstore, skin care, sensitive skin,
superdrug, drugstore, skin care, serum, clearly youthful, clear skin
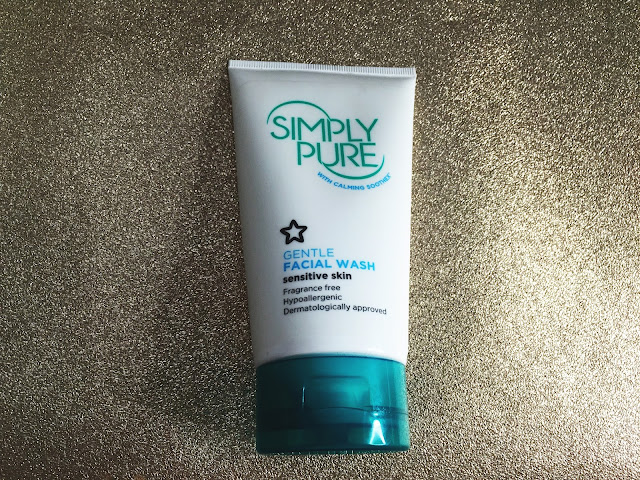
superdrug, drugstore, face wash, sensitive skin, hypoallergenic, clear skin,
superdrug, drugstore, skin care, serum, clearly youthful, clear skin
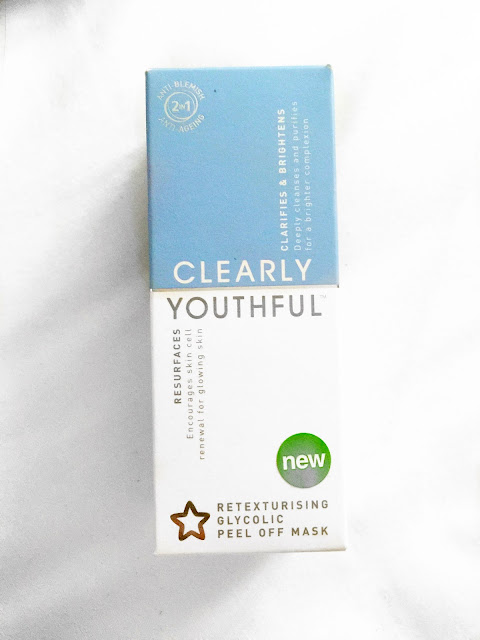
superdrug, drugstore, face mask, glycolic peel, spots, budget brand,


 Lits, I just wash my face with the gel cleanser and if I am going to double cleanse I will go in with the foam afterwards. And I find using this mainly is what is keeping my skin clear. 

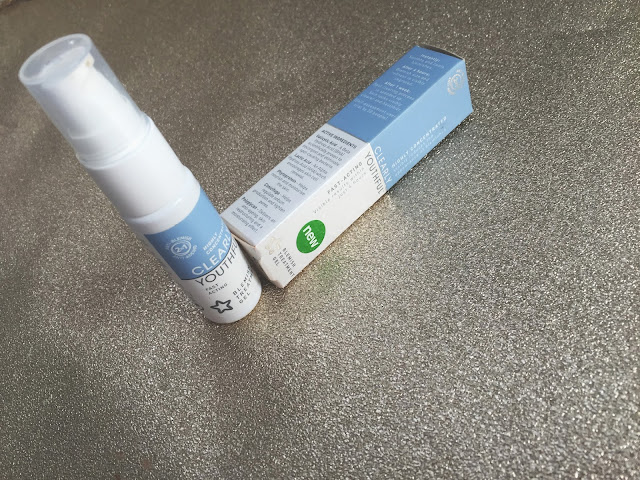
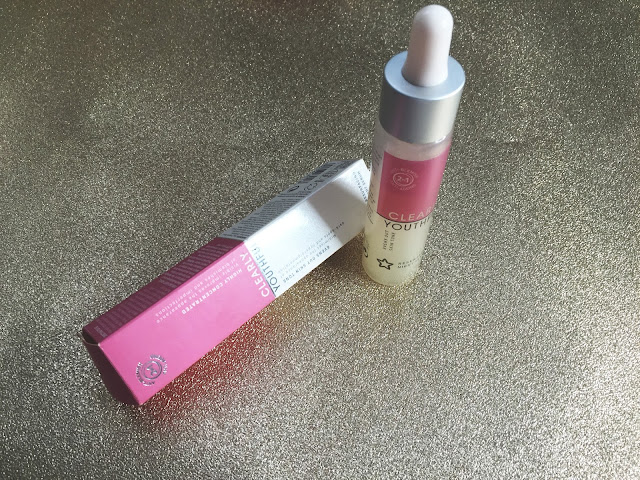
The serum I use at night and it leaves your skin super soft, and the blemish gel I use on my spots, it reduces the redness and helps them disappear. Warning though. If you have picked at your spot, do not use this straight away as it stings. Ha. 

Once or twice a week I will use the face peel. I cannot say enough how much I enjoy using these products. I am aiming to get the rest of the Youthful range. LOVE IT. 

I haven't been using any other skin product to clear my skin at all recently, so my lack of spots and more even and bright skin is down to Superdug's own brand. 


I am totally loving it. They are purse friendly and effective.

Simply Pure wash: £2.69

Simply Foam Cleanser: £2.69

Clearly Youthful Serum: £4.89

Blemish Gel: £3.49

Glycolic Peel: £4.89

I never back anything I don't truly believe in and to me right now, these are miracle products. 

You can find these all in your local Superdrug right now. 

Don't forget to give my blog a follow on Bloglovin' here.


You can also find me on the following SM sites.

Twitter: Leluroxxblogger

Instagram: Leluroxxblogger

YouTube: Leluroxxblogger

Snapchat: Blackeyedfox 


Until next time...


leluroxxblogger


SHARE:
© LoneWolfLeya. All rights reserved.
Blogger templates by pipdig